 Decorationg Interior Design
The heart of every home is frequently enough found at the dining room table, where meals are shared, stories are told, adn memories are made. If your dining room feels more mundane than magical, it’s time for a makeover! In this listicle, we present 29 inspiring DIY dining room projects that will breathe new life into your space and elevate your culinary experiences. From stylish centerpieces to functional furniture upgrades, each project is designed to inspire creativity and reflect your personal style while enhancing the overall ambiance of your dining area. Whether you’re seeking a swift refresh or a complete conversion, these innovative ideas will help you create a warm and inviting haven that invites family and friends to gather around.So roll up your sleeves and get ready to embark on a creative journey that will turn your dining room into the culinary retreat you’ve always dreamed of!
Revamp Your Dining Table with a Custom Stain: Give your dining table a fresh look by experimenting with different stain colors to match your home’s aesthetic
Transforming your dining table can be a delightful DIY project that breathes new life into your dining area.A custom stain allows you to personalize the look, ensuring your table complements your home’s unique aesthetic. Consider these stain colors to inspire your choice:
- Classic Walnut: Warm and inviting,perfect for customary homes.
- Antique White: A chic, vintage-inspired finish that brightens up any space.
- Rich Espresso: Adds a touch of sophistication, ideal for modern décor.
- Gray Wash: Trendy and neutral, enhances both rustic and contemporary styles.
- Deep Red Oak: A bold statement that evokes warmth and coziness.
while choosing a stain color, it’s essential to consider how it will interact with existing furniture and decor.To help visualize how different stains can impact the overall ambiance, refer to the table below:
| Stain Color | Best Fit | Atmosphere Created |
|---|---|---|
| Classic Walnut | Traditional | Warm and inviting |
| Antique White | Eclectic | Bright and airy |
| Rich Espresso | Modern | Sleek and elegant |
| Gray Wash | Rustic/Contemporary | Trendy yet relaxed |
| Deep red Oak | Cozy | Warm and inviting |
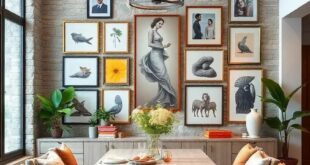
Create a Gallery Wall of Food-Inspired Art: Curate a collection of prints, paintings, or photos that celebrate culinary themes to add character and warmth to your dining area
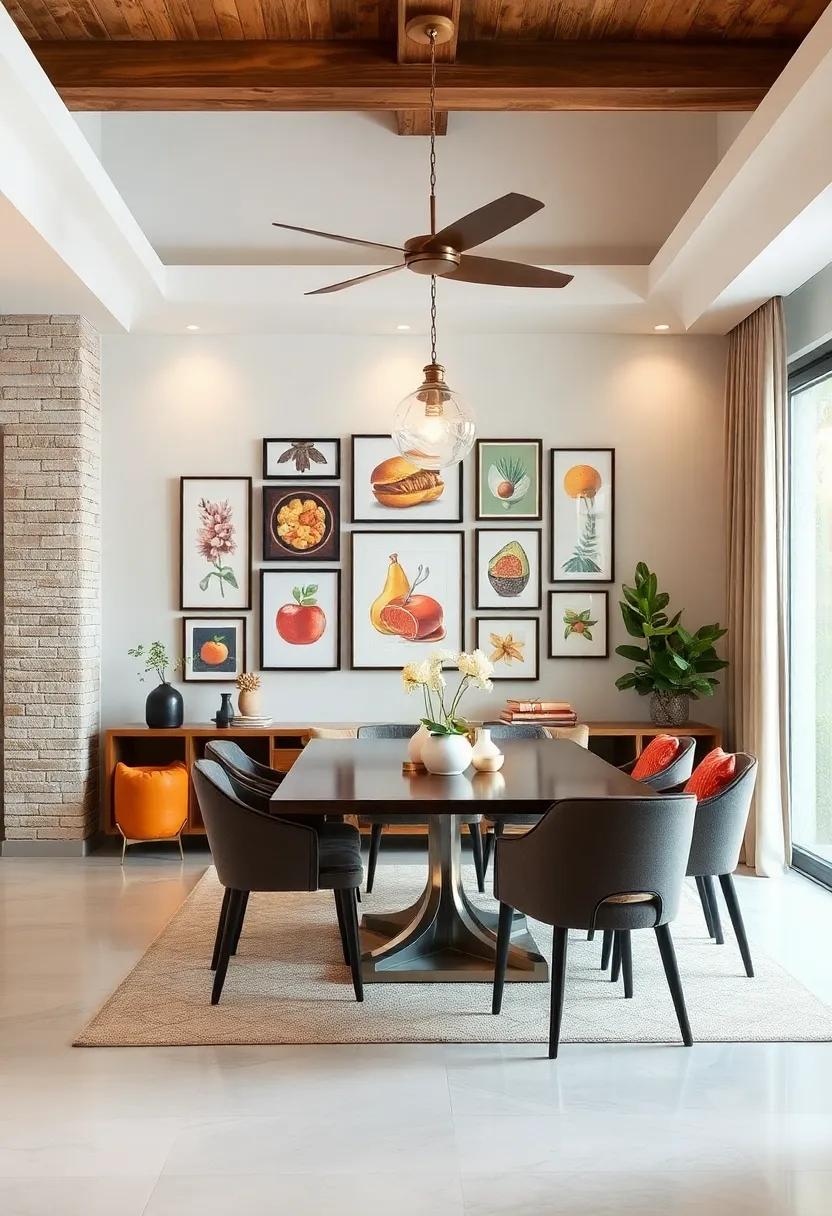
Transform your dining area into a feast for the eyes by curating a gallery wall that echoes the joy of cooking and the beauty of food. Start by selecting a variety of artwork featuring culinary themes that inspire you.Consider mixing and matching different types of art, such as:
- Botanical Prints – Celebrate the herbs and vegetables that enhance your dishes.
- Vintage Food Advertisements – Add a touch of nostalgia with colorful depictions of classic foods.
- Food Photography – Showcase vibrant photos of beautifully plated dishes that provoke appetite and admiration.
- Abstract Art – Choose pieces that evoke the colors and textures of your favorite foods.
To create a cohesive look,consider using frames that complement your dining room’s decor.You can even create a theme around specific cuisines, such as Italian or Asian, which can guide your selection process. Arrange your pieces in a gallery format that fills the wall but also leaves room for breathing space, ensuring each artwork gets its moment to shine. Here’s a simple layout idea to get you started:
| Position | Artwork Type | Color Palette |
|---|---|---|
| Center | large Botanical Print | Green and Earthy Tones |
| Top Left | Vintage Advertisement | Bright and Bold Colors |
| Bottom Right | Food Photography | Warm Hues |
| Side Accents | Abstract art | Complementary Palette |
Build a DIY Bench for Extra Seating: Maximize space and comfort by crafting a stylish bench that provides extra seating and can be tucked away when not in use
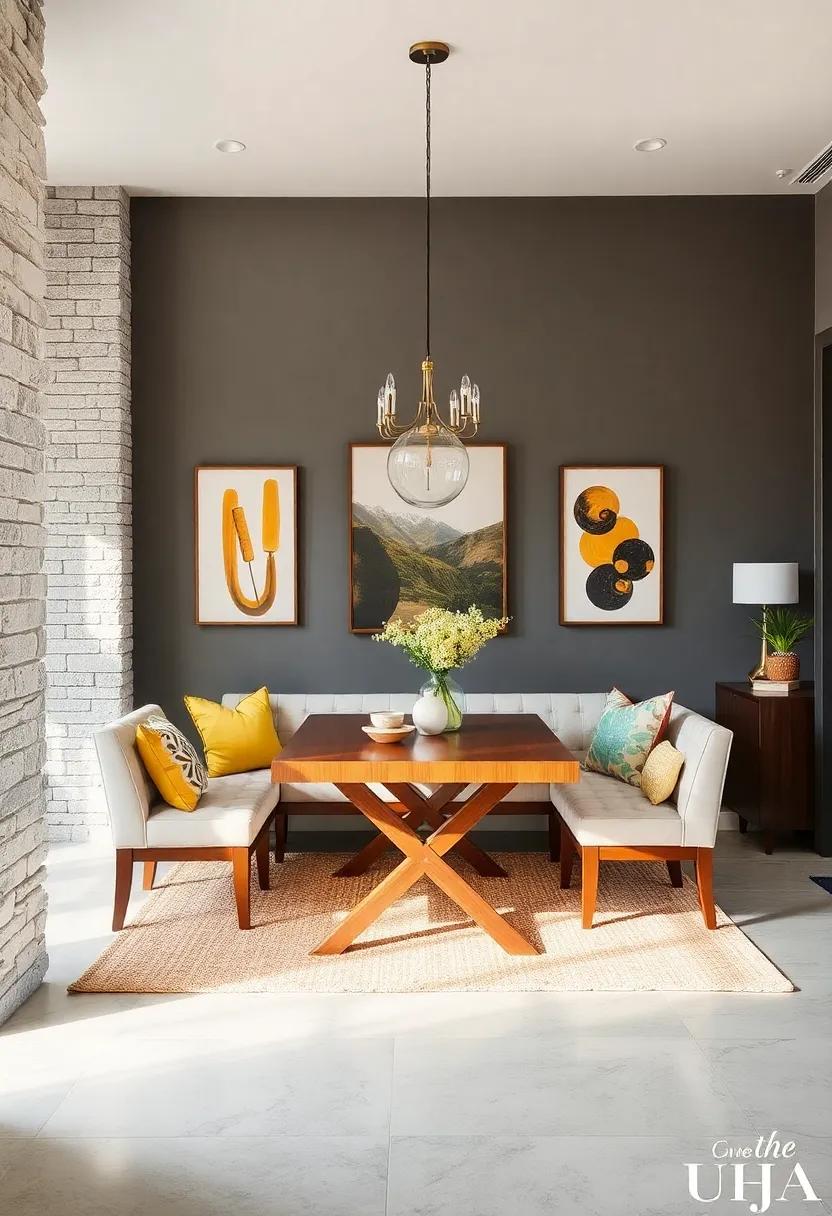
Creating a stylish DIY bench not only enhances the aesthetic appeal of your dining area but also adds valuable extra seating for gatherings and everyday use. When designing your bench, consider using reclaimed wood for a rustic charm or sleek metal for a modern touch. The dimensions should be tailored to fit your space; aim for a length that can comfortably accommodate several people while ensuring it can easily be tucked against a wall or under a large dining table when not needed. A simple design with clean lines enhances versatility and allows the bench to double as a decorative element.
Incorporate some thoughtful features that elevate functionality and comfort, such as:
- Cushioned seating for enhanced comfort during long dinners.
- Storage solutions underneath the bench for extra table linens or dining essentials.
- Custom paint or stain to match your existing decor, making it truly your own.
Utilizing a foldable design can also maximize space efficiency; consider attaching hinges to allow the bench to fold up or down as needed. With a little creativity and effort, you can create a multi-purpose piece that transforms your dining room into a cozy and inviting space.
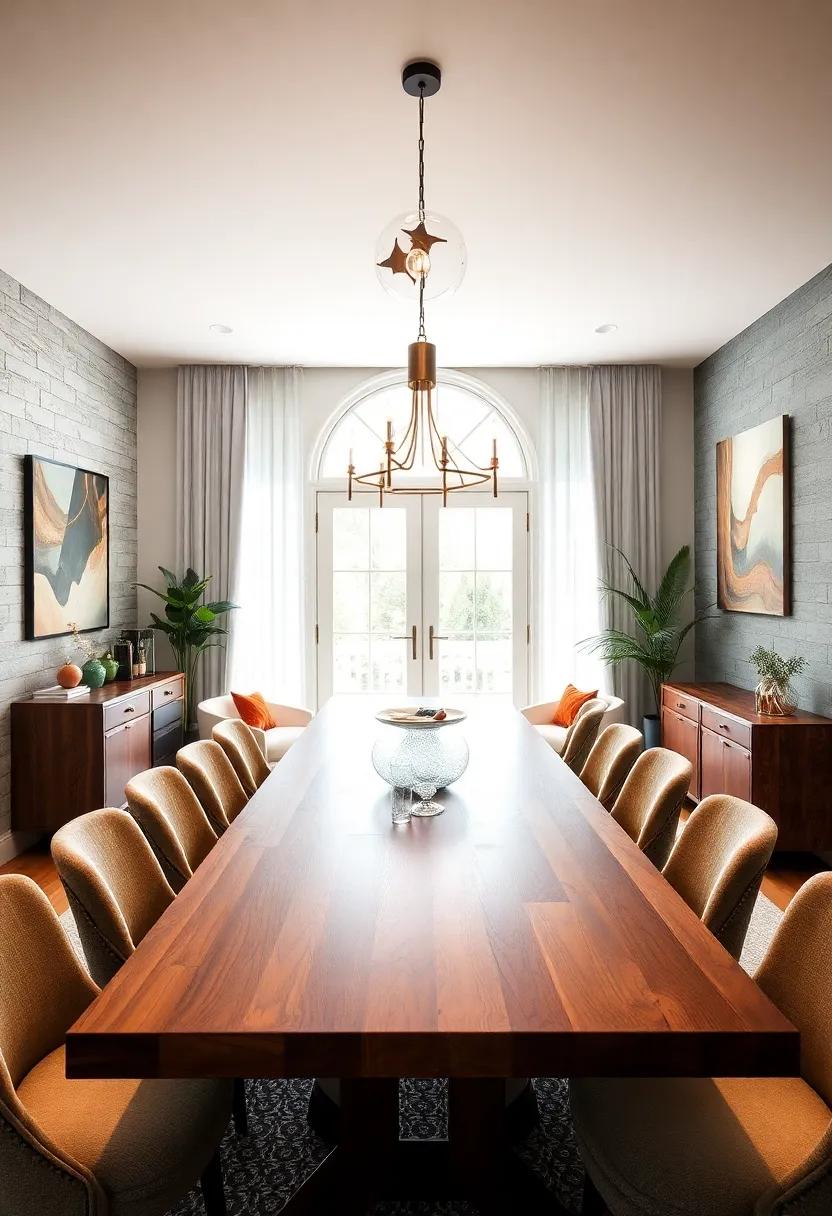
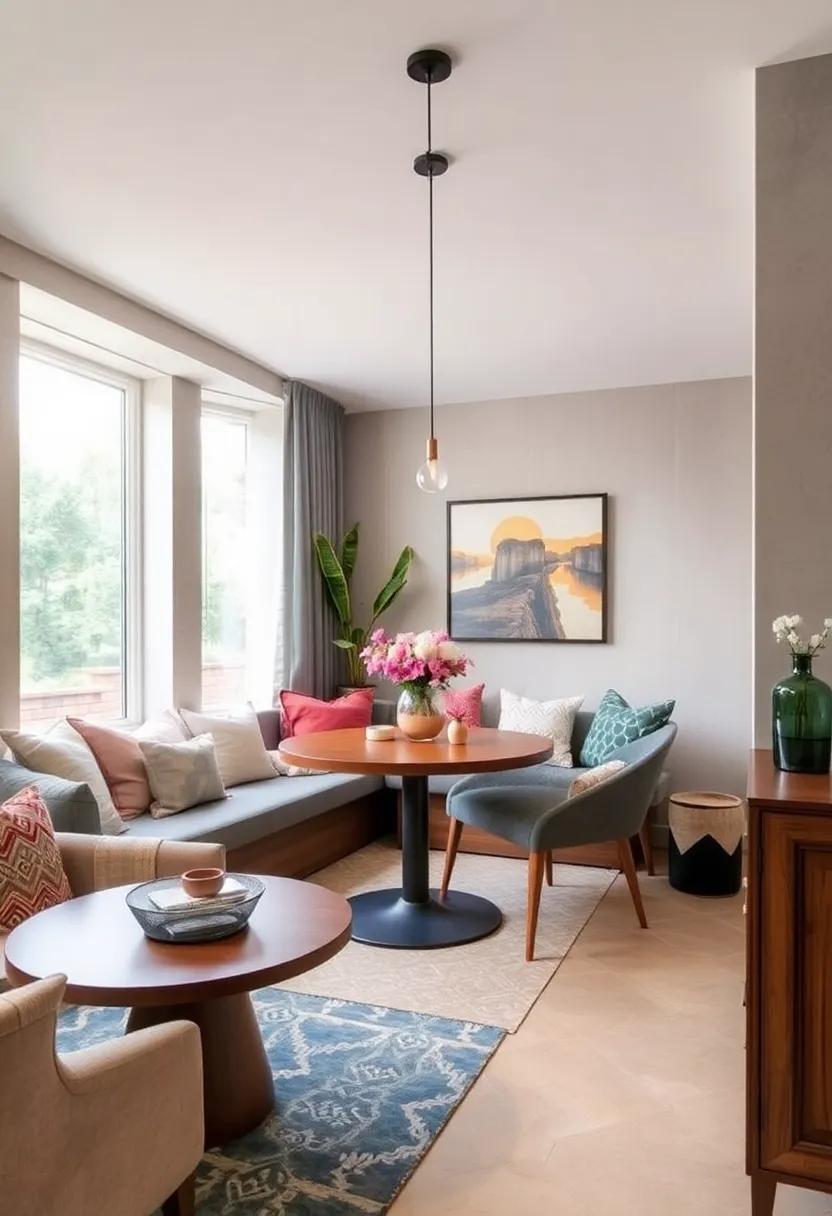
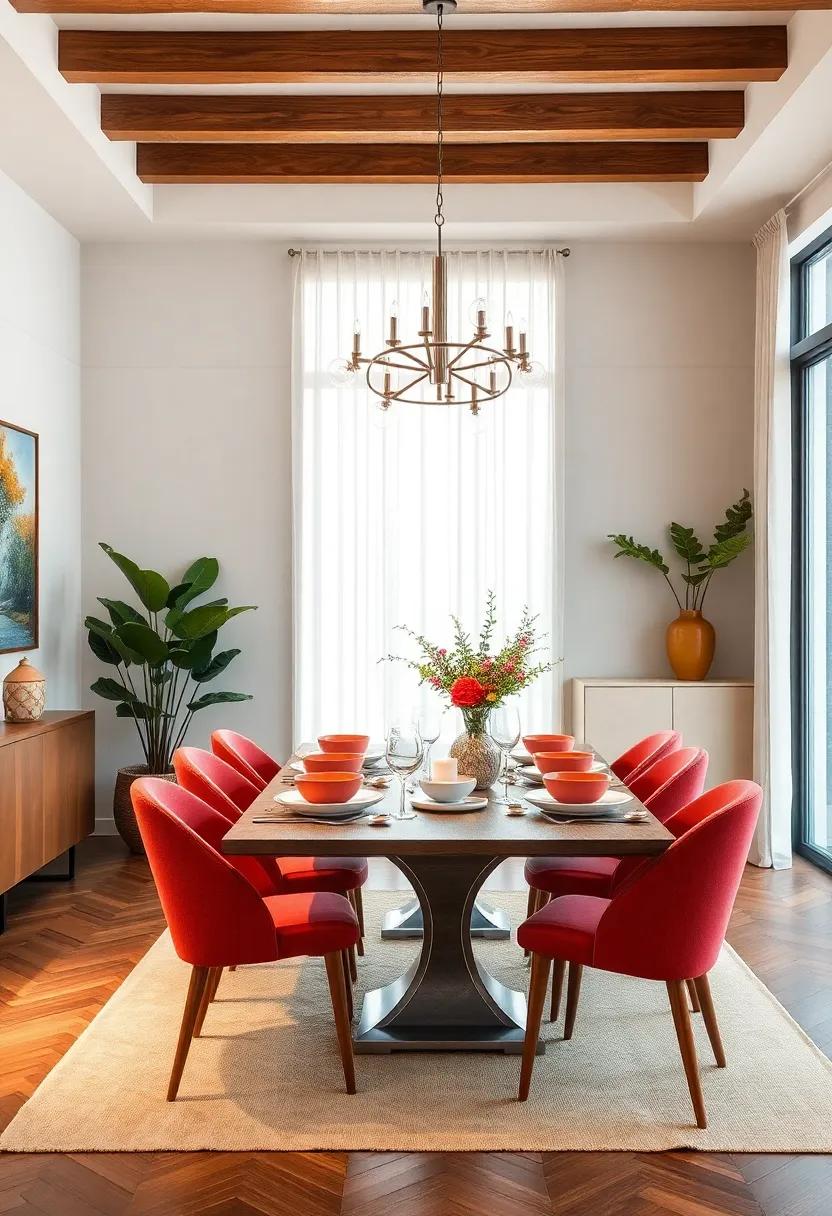
Hang Pendant Lights for a Statement Piece: Replace standard overhead lighting with eye-catching pendant lights that enhance the ambiance and create a focal point in your dining room
Transform your dining room into a captivating space with the addition of stunning pendant lights that serve as both a functional and decorative element.These lighting fixtures come in a myriad of styles, materials, and colors, allowing you to tailor them to your unique decor.Whether you prefer sleek, modern designs or rustic, vintage-inspired options, hanging pendant lights can dramatically enhance the ambiance, making your dining area inviting and warm.
To create the perfect focal point,consider the following tips:
- Choose the Right Size: Ensure your pendant lights are proportionate to your table size and ceiling height for a balanced look.
- Layer Your Lighting: Pair pendant lights with sconces and floor lamps to achieve a well-rounded lighting scheme.
- Mix and Match: Don’t be afraid to mix different styles and finishes for an eclectic and personalized feel.
- Consider Placement: Hang your pendant lights about 30 to 36 inches above the table to ensure ample illumination without obstructing views.
| Style | Material | Color |
|---|---|---|
| Industrial | Metal | Black/Silver |
| Farmhouse | Wood | White/Warm Brown |
| Modern | Glass | Clear/Chrome |
| Bohemian | Rattan | Natural/Tan |
incorporate dimmer switches for flexibility in your lighting. Adjustable brightness levels can create an intimate atmosphere during dinner parties or a lively vibe for family gatherings. With the right pendant lights, your dining room won’t just be a place for meals but a beautiful setting that brings everyone together.
Design a Customized Table Runner: Sew or paint a unique table runner that reflects your personality and seasonal themes for a refreshing dining experience
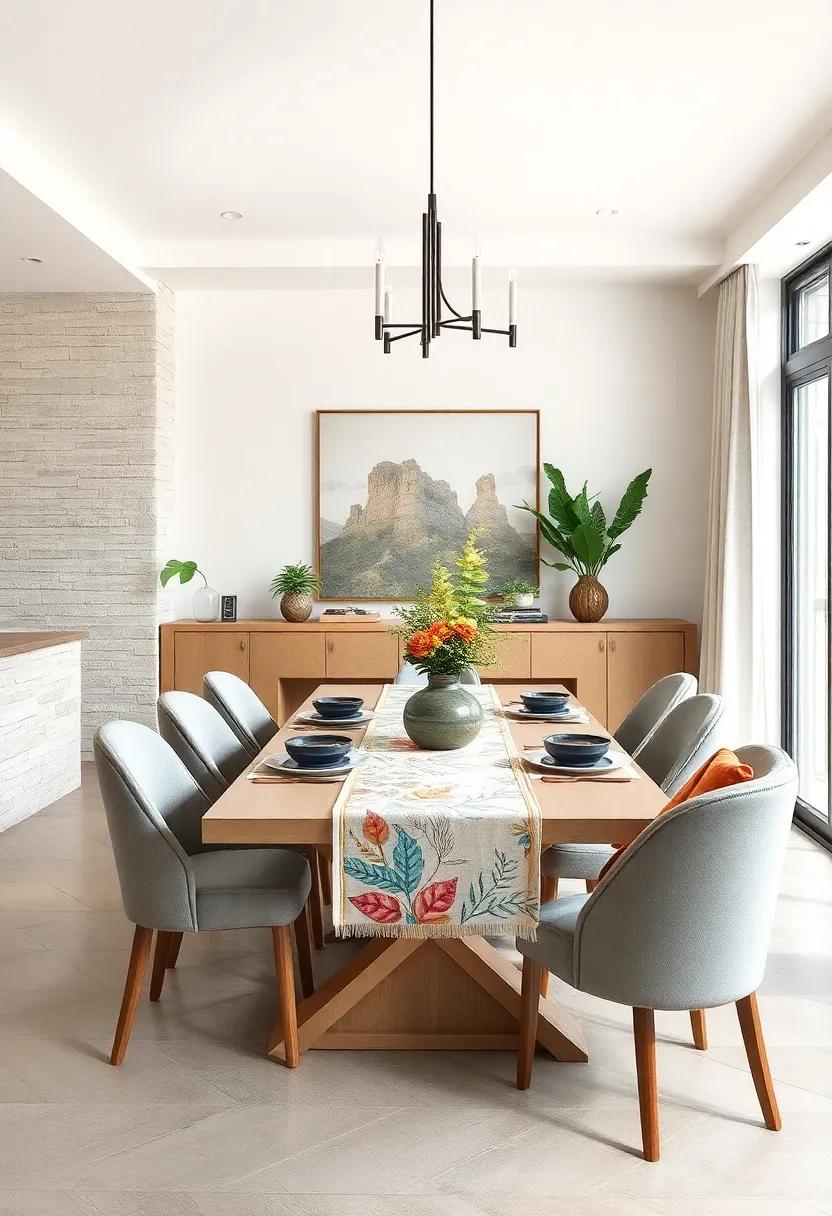
Elevate the ambiance of your dining area by crafting a personalized table runner that mirrors your tastes and aligns with the seasons. Start by choosing your favorite fabric or stencil a captivating design onto a plain runner.Consider using colors that resonate with your personality—vibrant prints for a lively feel, or soft pastels for a serene touch. You can also incorporate seasonal themes, such as autumn leaves, winter snowflakes, or summer florals, which will help create a dynamic yet cohesive dining environment throughout the year. The beauty of DIY is that you get to decide the patterns, colors, and even textures that come together in your creation!
To get started, gather the necesary materials, including fabric, fabric paint, brushes, stencils, or a sewing machine if you’re aiming for a sewn finish.If you’re sewing, put together a list of patterns that could inspire your design. Don’t forget to consider the following elements that can enhance your table runner:
| Element | Ideas |
|---|---|
| Color Palette | Choose complementary colors or a monochromatic scheme. |
| Patterns | Polka dots, stripes, or floral designs can add character. |
| Embellishments | Add lace, pom-poms, or beading for texture. |
| Personal Touches | Incorporate initials or meaningful symbols. |
| Seasonal Themes | Reflect the mood of the season through appropriate motifs. |
With the right supplies, your custom table runner will be a beautiful dialog piece that brings a fresh perspective to every meal. Don’t hesitate to experiment with various techniques like tie-dye or block printing to further personalize your runner. The end result will be more than just a dining accessory; it will be a work of art that encapsulates your unique style and seasonal vibes, making every dining experience feel like a festivity.
Upcycle Vintage Chairs with a Fresh Coat of Paint: Breathe new life into old chairs by painting them in bold colors or patterns that harmonize with your dining space
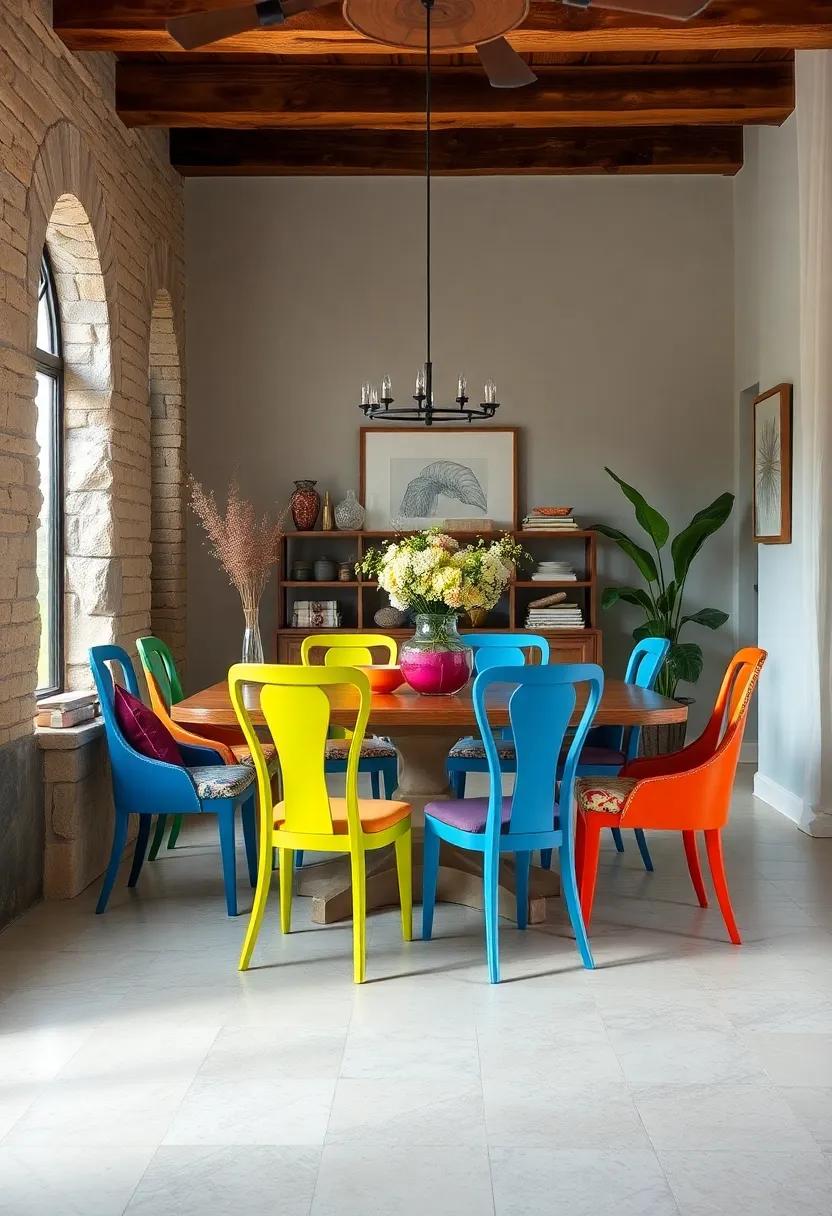
Transforming vintage chairs into vibrant focal points for your dining space can be an exhilarating project. Start by selecting chairs that speak to you; the unique shapes and designs are part of their charm. Once you’ve chosen your pieces, prepare them by sanding down any rough edges and cleaning them thoroughly. Next, unleash your creativity with a selection of bold colors or playful patterns that resonate with your overall aesthetic. From tropical hues to geometric designs, the possibilities are endless.Remember, a pop of color can inspire conversations and brighten your dining experience.
For a cohesive look, consider organizing your painting project and choosing complementary shades for both chairs and decor. Here are some ideas to elevate your chairs:
- Monochromatic scheme: Pick varying shades of a single color for a sophisticated effect.
- Contrasting colors: use vibrant reds against soft blues for a dynamic contrast.
- seasonal patterns: Paint leaves for fall or waves for summer to reflect the time of year.
- Textured finishes: Experiment with matte or glossy finishes to change the chair’s character entirely.
To make your project even easier, here’s a simple guide for choosing paint types:
| Paint Type | Best For |
|---|---|
| Chalk Paint | Creating vintage or shabby chic looks |
| Acrylic Paint | Bright colors and patterns |
| Spray Paint | Quick and even coats |
| Milk Paint | Eco-pleasant and textured finishes |
Create a Mini Herb garden Centerpiece: Use small pots to grow herbs that not only serve as a beautiful centerpiece but can also be snipped for cooking
Transform your dining table into a vibrant haven by using small pots to create a mini herb garden centerpiece. Choose vibrant containers that complement your table decor while ensuring they are functional for herb growth. Basil, thyme, parsley, and cilantro are fantastic choices, each bringing their unique fragrance and flavor to your kitchen. Arrange them in a cluster or line up along the center of the table to create an inviting atmosphere that sparks culinary creativity. Plus, the fresh herbs serve not just as decoration but as a convenient source of fresh ingredients to elevate your meals.
To make the most of your herb garden, consider the following tips: Choose pots with drainage holes to ensure healthy plant growth, use a mix of pot sizes for visual interest, and label each herb with charming tags to easily identify your plants at a glance. A simple table like the one below can help you decide which herb to plant based on your cooking preferences:
| Herb | Flavor Profile | Dish Pairing |
|---|---|---|
| Basil | Sweet and slightly spicy | Pasta, salads |
| Thyme | Earthy and subtle | Soups, roasts |
| Parsley | Fresh and slightly peppery | Garnish, sauces |
| Cilantro | Citrusy and herbal | Mexican, Asian dishes |
Install Open Shelving to Display Your Dishware: Show off your favorite dishes and glassware on open shelves, creating both a functional and decorative display
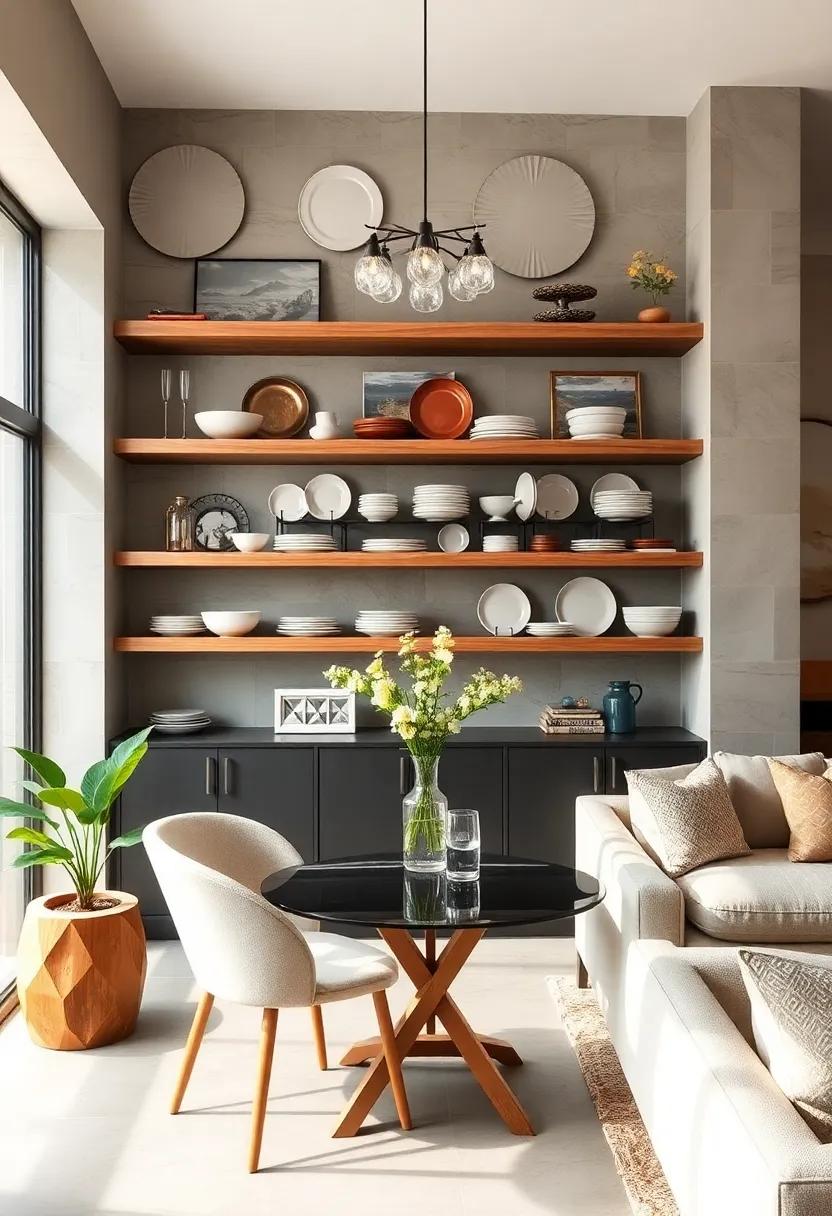
One of the most delightful ways to infuse personality into your dining room is by installing open shelving to showcase your favorite dishware and glassware.This design approach not only provides a functional space for your kitchen essentials but also creates an eye-catching focal point that invites conversation. Consider selecting rustic wooden shelves or sleek metal brackets to complement your home decor style while allowing you to display your treasured items. You can achieve visual interest by arranging your pieces thoughtfully, balancing colors, shapes, and textures.
To make the most of your open shelving, you might want to incorporate a few styling tips to create a stunning display:
- Layering: Place larger items like plates at the back and smaller bowls or cups in front.
- Grouping: Cluster similar colors or materials together to enhance aesthetic appeal.
- Seasonal rotate: Change out certain pieces for seasonal decor to keep the display fresh.
- Use baskets: Incorporate woven or decorative baskets for storing less visually appealing items.
Craft a DIY Chalkboard Wall for Menus: Transform a section of your dining room into a chalkboard wall where you can write daily menus or inspirational quotes

Imagine entering your dining room and being greeted by a stunning chalkboard wall, a canvas for creativity and culinary inspiration.To create this dramatic feature,you’ll need a smooth wall surface and chalkboard paint,which is easily available at your local home enhancement store. Start by measuring your desired area, than prep the wall by filling any holes or imperfections. Apply a coat of primer and allow it to dry before applying at least two layers of chalkboard paint, giving each layer ample drying time in between. Once your chalkboard surface is ready, unleash your imagination as you write daily menus, motivational quotes, or even doodles that can spark conversations during dinner parties.
For functionality and fun, consider incorporating different chalk colors and styles of chalkboard pens to enhance your wall aesthetics. To make this DIY project even more engaging, you can organize your chalkboard wall into sections, like so:
| Section | Purpose |
|---|---|
| Daily Menu | List out what’s cooking each day to keep everyone excited! |
| Inspirational Quotes | Motivate your family or guests with uplifting words. |
| special Events | Mark upcoming celebrations or family gatherings. |
| Recipe Ideas | Jot down new dishes to try out together. |
This dynamic addition not only enhances the visual appeal of your dining space but also fosters a sense of community as family and friends can contribute to the wall’s content. Handwritten reminders or kitchen tips can flow seamlessly into your dining experience, making meals more interactive and enjoyable.
Make a Cozy Window Seat: Utilize a bay window or a vacant corner to create a cozy window seat, ideal for sipping coffee and enjoying a meal
Transform your dreary corner or bay window into an inviting nook that beckons for leisurely mornings and relaxed evenings. To get started, consider these elements:
- Soft Cushions: Pile on plush cushions in various textures and colors to enhance comfort and style.
- Blankets: Keep a cozy throw nearby for those chilly days when you want to snuggle up while enjoying your favorite book.
- Personal touch: Add personal decor such as framed photos or small potted plants to infuse the space with your personality.
Next, think about the practicality of your window seat. for an optimal experience, incorporate these suggestions:
- Table Surface: Install a narrow shelf or a movable tray table to hold your coffee mug or a tasty snack while you unwind.
- Lighting: Position a small table lamp or string lights nearby to create a warm ambiance during evening use.
- Storage Options: Utilize the space underneath the seat with decorative boxes or baskets for stashing away blankets or books, keeping the area tidy.
Transform Your Walls with Removable Wallpaper: Add pattern and style to your dining room walls with removable wallpaper that’s easy to change when you want a new look
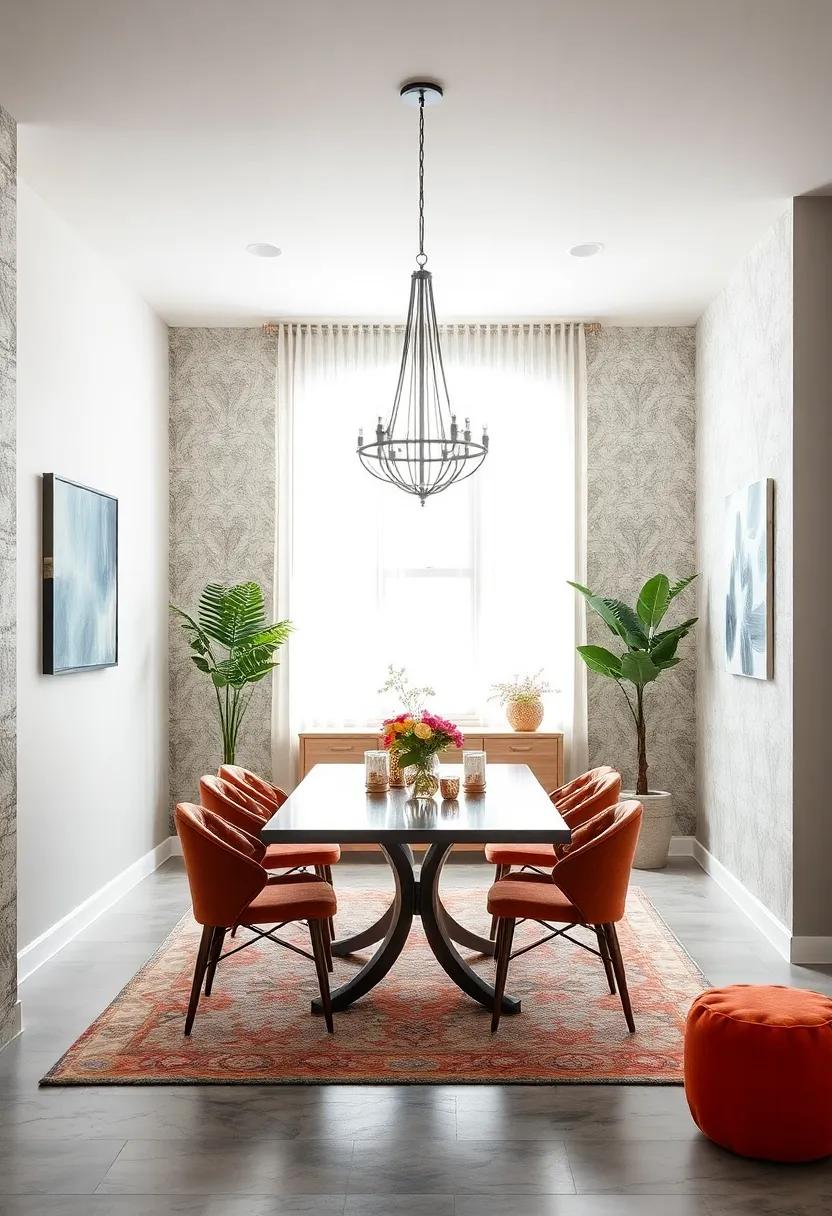
Elevate your dining room aesthetics effortlessly with the charm of removable wallpaper. This versatile design tool allows you to experiment with various patterns and colors without the commitment of traditional wallpaper. Whether you’re drawn to bold botanicals, playful geometrics, or soft pastels, the options are limitless. The beauty of removable wallpaper lies in its ability to transform your space in just a few hours, instantly bringing life and personality to the walls. You can play around with different styles to match seasons or changing tastes, creating a canvas that reflects your culinary creativity.
To ensure a seamless application, it’s advisable to prepare your walls by cleaning them and ensuring they are smooth. Look for washable and peel-and-stick designs that make maintenance a breeze. Additionally, consider these ideas to maximize impact:
- Accent Wall: Choose one wall to become the focal point with a striking wallpaper design.
- Framed Panels: Create framed sections using removable wallpaper to mimic wainscoting.
- Layering Textures: Combine wallpaper with other design elements like wood panels or shelves for depth.
With removable wallpaper, the freedom to explore and refresh your dining area is limitless. Discover the thrill of having a new dining room look whenever inspiration strikes!
Install a DIY wooden Plank Ceiling: Boost your space’s design by adding texture with a wooden plank ceiling that brings warmth and rustic charm
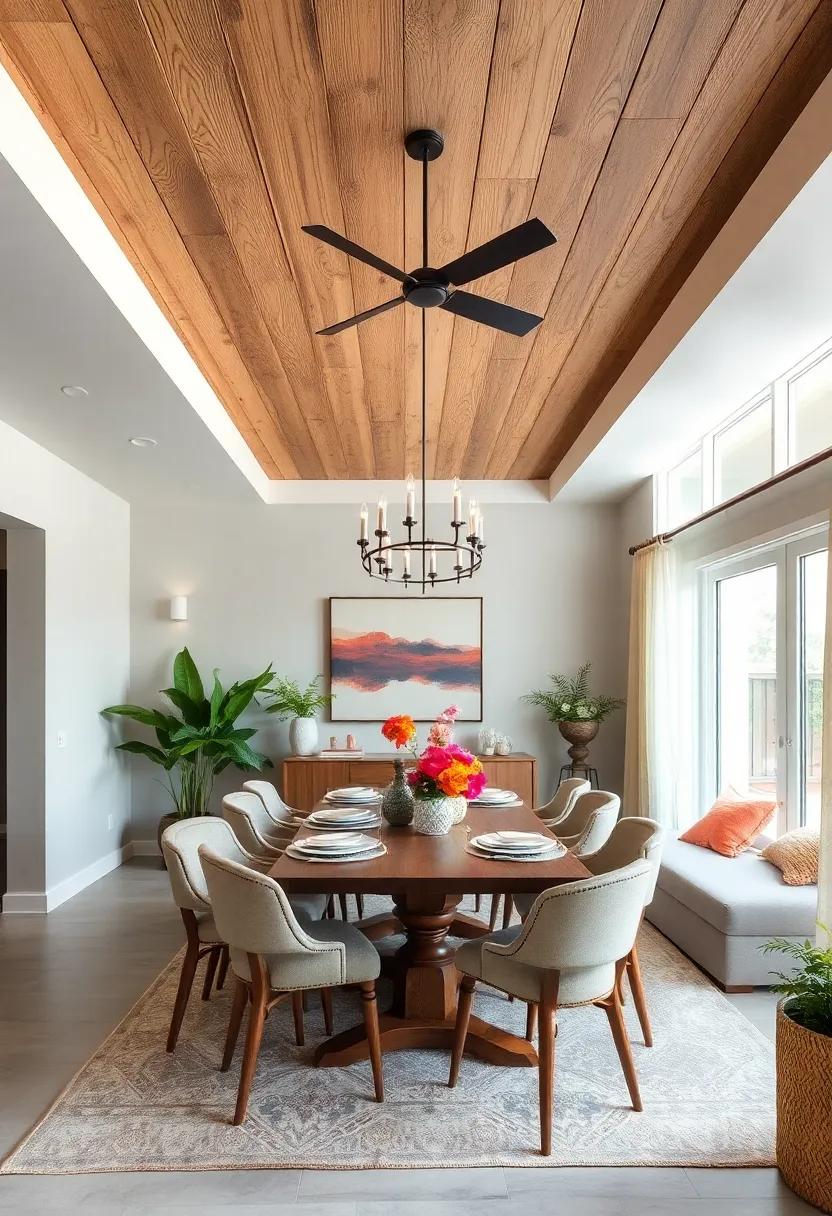
Transforming your ceiling into a stunning wooden plank feature can dramatically change the atmosphere of your dining room.This project not only adds a layer of texture but also infuses warmth and rustic charm that invites comfort and coziness. start by selecting your wood; options such as cedar, pine, or birch can bring different hues and character to your space. Once you have your materials, you’ll need basic tools like a saw, drill, and level to ensure a precise fit. Begin by measuring your ceiling and cutting your planks to size, then layout the designs you might want; a staggered pattern can create visual interest, while straight rows can lend a more formal touch.
After your planks are cut and ready, the next step is to prepare the ceiling surface and account for insulation or wiring if necessary. You can enhance your wooden ceiling with a stained finish or leave it natural for a minimalist look. Attaching the planks can be achieved with glue or nails, depending on the type of finish you prefer.Be sure to sand the edges to prevent splinters and achieve a smooth transition to walls or fixtures. The end result will give you a unique ceiling that makes your dining room not just a place to eat, but a true culinary haven where the aesthetic encourages both conversation and creativity.
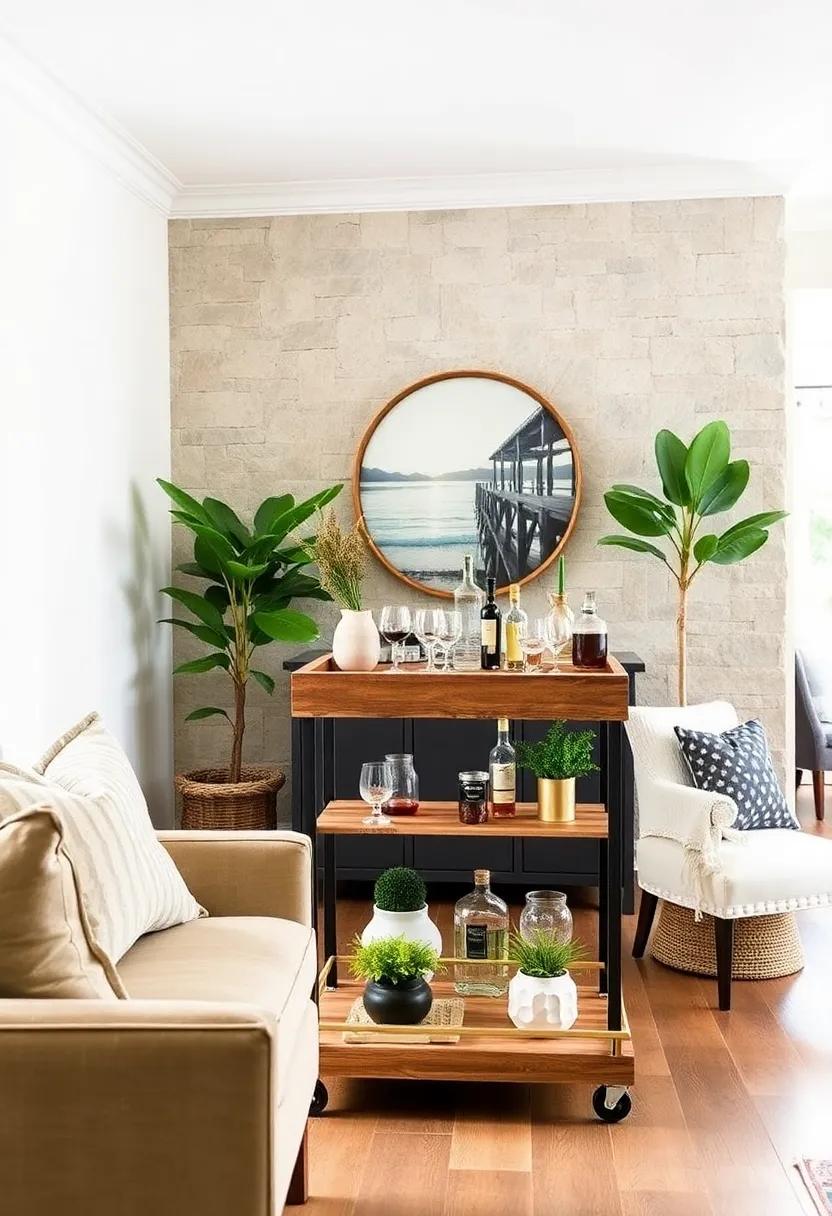
Create a Beverage station: Set up a dedicated area for coffee, tea, or cocktails that’s both functional and stylish, making entertaining a breeze
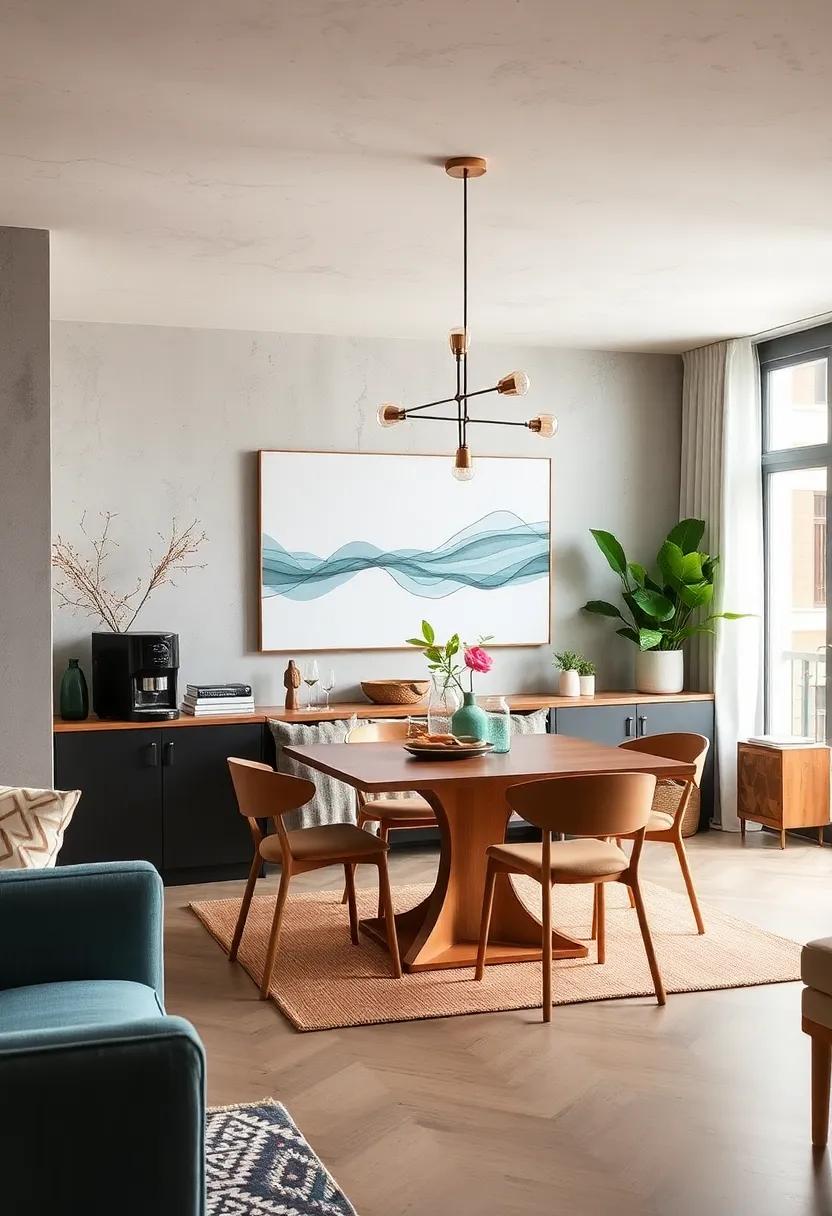
Design your very own beverage station to serve as a focal point in your dining area, turning mundane drink prep into a delightful experience. Choose a console table or cart that complements your decor while offering enough space to neatly organize your beverage essentials. Consider using stylish trays to group items like coffee beans, tea leaves, or cocktail mixers, ensuring everything is accessible yet beautifully arranged. You can also add mason jars or decorative canisters to store sugar, spices, or garnishes, marrying functionality with style.
Elevate the aesthetic by incorporating elements that reflect your personal taste. Use vintage glassware for an elegant touch or colorful mugs to bring a modern flair. Adding a small chalkboard to list your drink specials or a mini herb garden for freshness can create an inviting atmosphere. Consider a sleek shelving unit that showcases not only your drinkware but also artistic bottles or unique bar tools, merging practicality with design. Below is an example of what your beverage station layout could include:
| Item | Purpose |
|---|---|
| Console Table | Base for organization |
| Serving tray | Group items stylishly |
| Glass Canisters | Store sugar/spices |
| Chalkboard | List specials |
| Herb Planters | Add freshness |
Design a statement Wall with Colorful Molding: Use paint and molding to create a bold statement wall that defines your dining space and adds depth
Transform your dining space into a visual masterpiece by incorporating colorful molding and paint into your design. Start by selecting a bold paint color that resonates with your dining aesthetic—think deep greens, rich blues, or vibrant yellows. Once you have your base color, use molding to create geometric patterns or classic wainscoting for added depth and interest.Here are some design ideas to consider:
- Vertical Stripes: Paint your wall in alternating colors to form vertical stripes. Use molding to outline the stripes, creating a sophisticated yet playful look.
- Framing Technique: Use thick molding to frame your wall sections, painting the frames in a contrasting color to the wall. This approach adds an elegant touch and draws the eye to beautiful wall art or decor.
- geometric Shapes: Create fun shapes with molding, such as triangles or hexagons, and paint them in a vibrant color palette that reflects your personal style. This modern design will surely make your dining area stand out.
To further enhance the visual appeal, consider incorporating a table that complements the statement wall. Here’s a simple palette table to inspire your color choices:
| Color | Hex Code | Suggested Molding Color |
|---|---|---|
| Emerald Green | #50C878 | Gold |
| Royal Blue | #4169E1 | White |
| Coral Pink | #FF6F61 | Dark Gray |
Incorporating these elements not only adds a bold touch but also enhances the overall dining experience, making each meal feel like a special occasion. embrace your creativity and have fun transforming your walls into a canvas that reflects your personal style!
Implement Cozy Lighting with String Lights: Drape string lights around the dining area for an inviting atmosphere that’s perfect for long dinners and gatherings
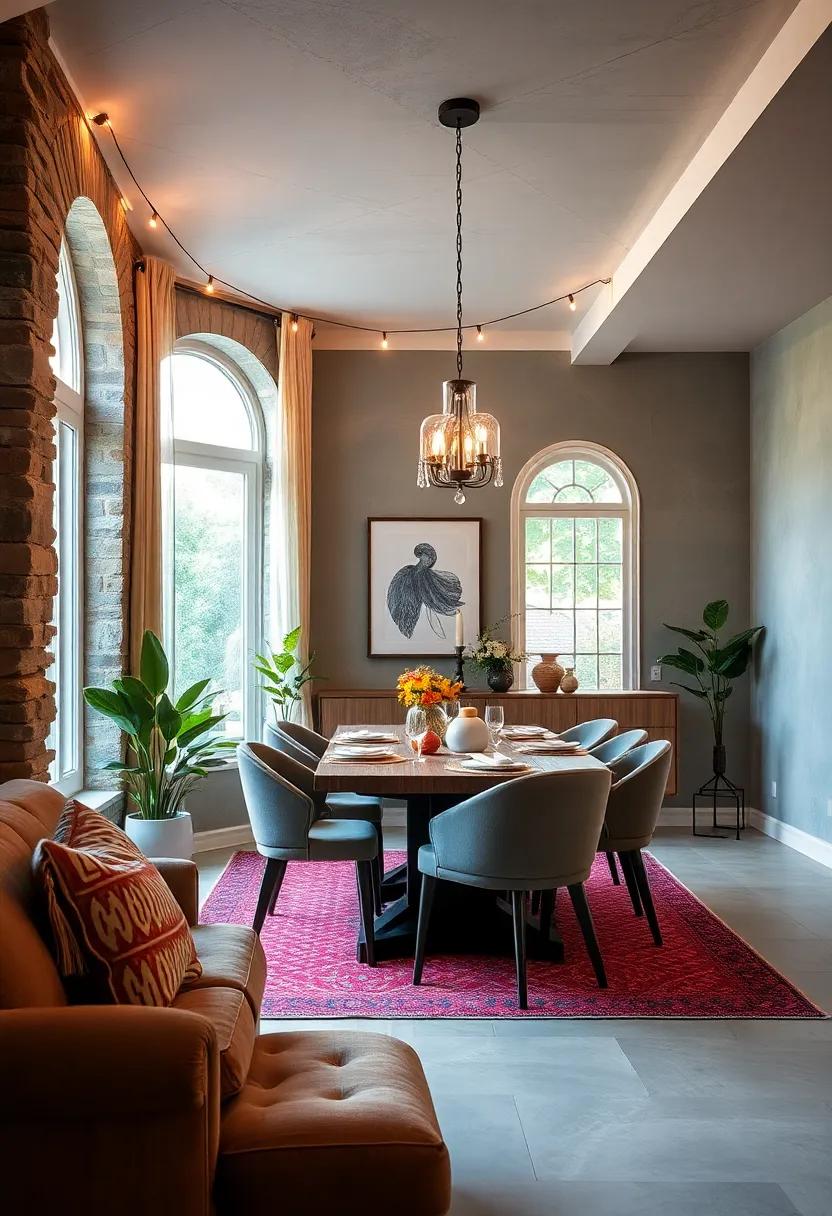
Transform your dining area into a warm and inviting space by draping string lights around the room. These delicate lights not only provide soft illumination but also evoke a sense of coziness that is perfect for long dinners and gatherings. Consider winding them along the edges of your ceiling or wrapping them around large pieces of furniture, such as bookcases or dining chairs, to create a magical atmosphere. You can even hang them from the walls or over a decorative archway, allowing their gentle glow to guide your guests to the dining table.
To enhance the inviting atmosphere even more, pair your string lights with other elements that bring warmth to the space. Here are a few ideas:
- Candle Holders: Use glass jars or decorative lanterns with candles to complement the soft light.
- Natural Decor: Incorporate plants or flowers for added color and freshness,making the ambiance feel more alive.
- textiles: Add textured tablecloths or soft seating options to create a layered look that invites guests to linger.
To help you visualize the arrangement, here’s a simple table outlining potential string light styles:
| Style | Description | Best For |
|---|---|---|
| Fairy Lights | small, twinkling lights that add a whimsical touch. | Casual gatherings or festive occasions. |
| Globe Lights | Larger bulbs that provide a retro vibe. | Modern decor styles, creating a statement piece. |
| Vintage Bulbs | warm, edison-style bulbs for a rustic feel. | Intimate dinners or outdoor patio settings. |
Build Your Own Rustic Bar Cart: Craft a charming bar cart from reclaimed wood, perfect for displaying your favorite spirits and glassware
Transforming reclaimed wood into a rustic bar cart is a rewarding DIY project that seamlessly combines function and charm. Begin by gathering your materials: reclaimed wood planks, caster wheels, and screws. The beauty of using reclaimed wood lies in its unique textures and colors, ensuring that no two carts are exactly alike. You can create a multi-tiered cart to maximize your storage space, allowing for various levels to showcase your favorite spirits and glassware. Consider adding a few small shelves or hooks on the side to hold essential bar tools or decorative elements such as fairy lights or potted herbs.
Once your structure is constructed, personalize it with unique finishes that reflect your style.A simple wood stain can enhance the natural beauty of the wood. To give your cart a more vintage vibe, try using chalk paint and distressing techniques to create that well-loved look. Here are some ideas to elevate your rustic bar cart:
- Add a wine rack for additional storage.
- Incorporate a few potted plants for a touch of greenery.
- Use a decorative tray to corral smaller items and keep the space tidy.
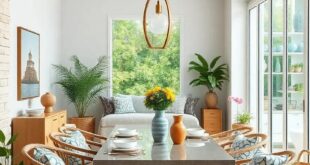
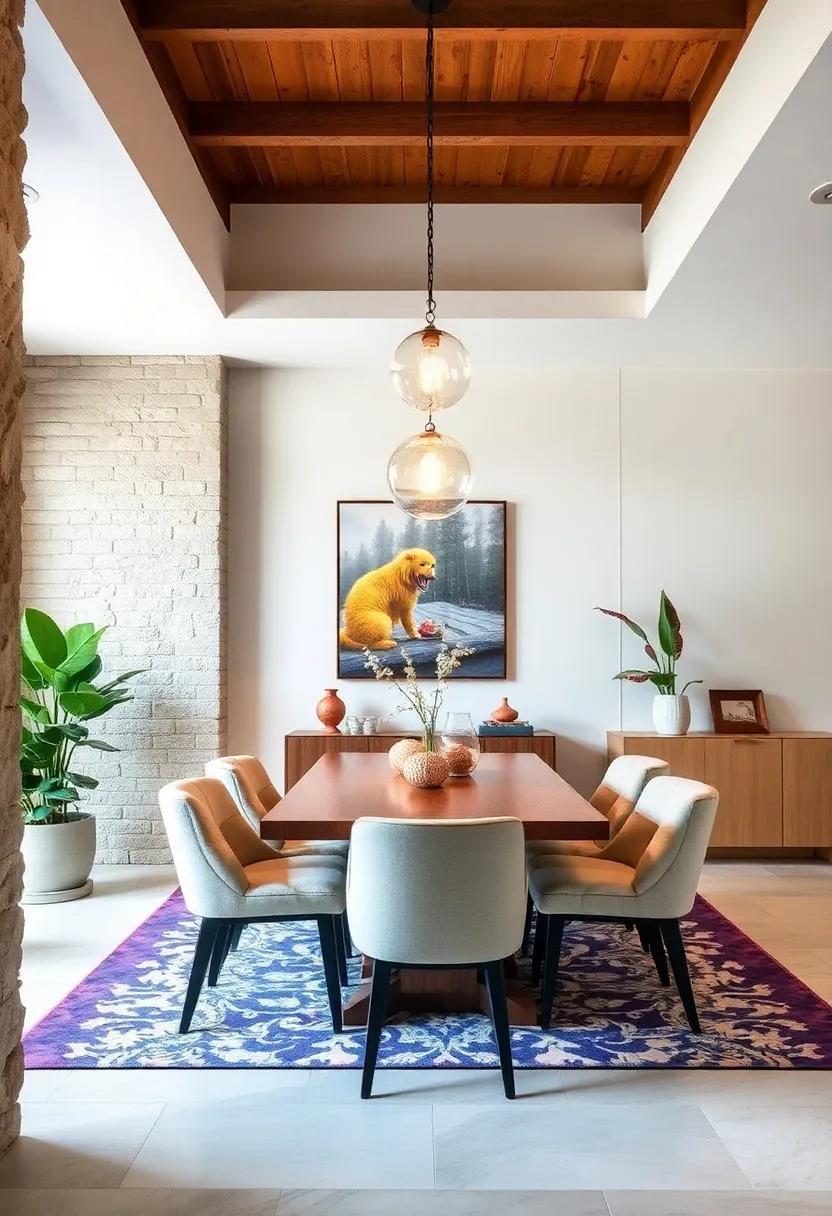
Introduce an Element of Nature with a Large Plant: Place a big potted plant or a small indoor tree in your dining room to breathe life and vibrancy into the space
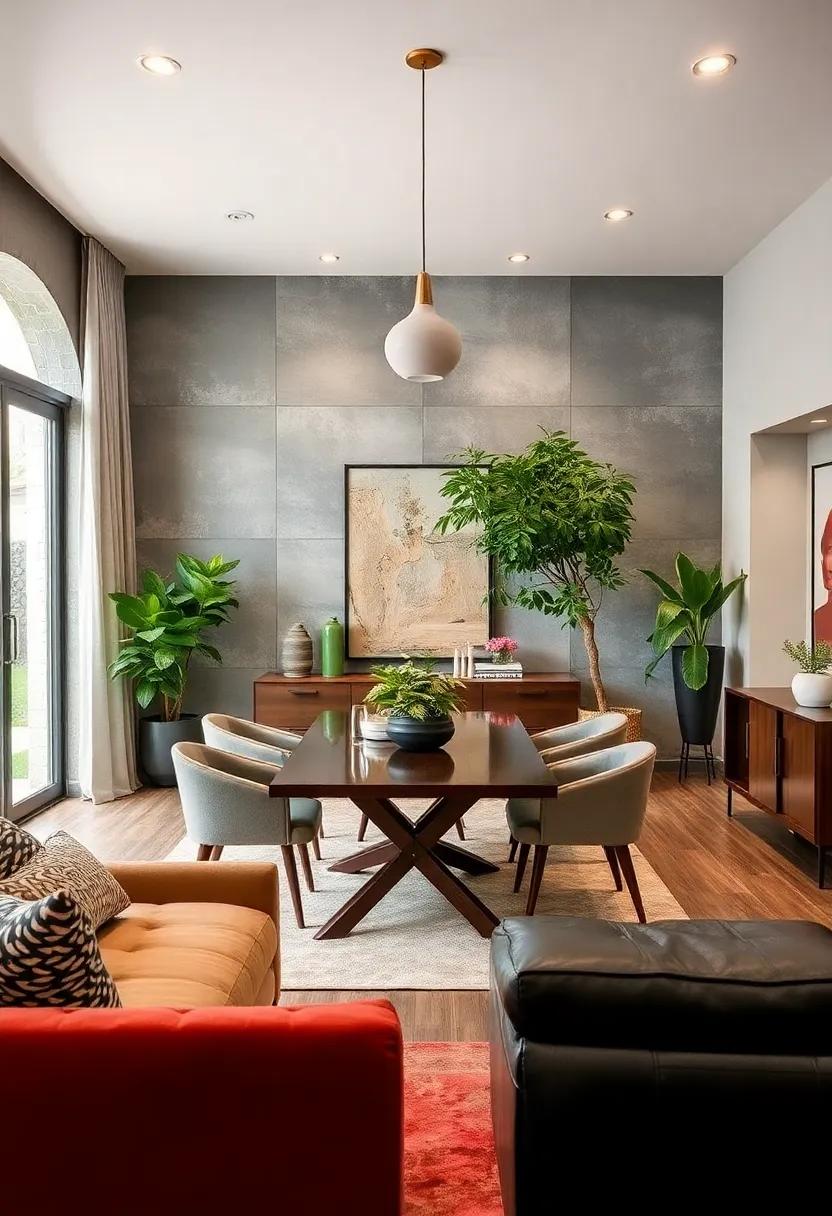
Transform your dining area into an inviting oasis by incorporating a striking potted plant or a small indoor tree. These natural elements not only enhance the aesthetic appeal of the room, but they also create a refreshing atmosphere. Think about choosing a plant that complements your décor, such as a fiddle leaf fig or a pothos, both known for their stunning foliage. Positioning your plant near the dining table or in a corner can create a beautiful focal point, drawing the eye and balancing the space. Make sure to choose a pot that reflects your style—whether it’s a sleek ceramic design or a rustic wicker basket, the right container can elevate your botanical statement.
Not only do large plants serve as beautiful décor, but they also promote a sense of tranquility and well-being. Here are some benefits of adding greenery to your dining area:
- improved Air Quality: Plants help to purify the air by removing toxins, creating a healthier dining environment.
- Increased aesthetic Appeal: A touch of nature adds warmth and character to an otherwise plain room.
- Enhanced Mood: The presence of greenery can elevate your mood and reduce stress, making mealtime more enjoyable.
Remember to place your plant where it can thrive! Pay attention to the amount of natural light the spot receives and consider your watering schedule. Some plants may require more care than others, so select one that fits your lifestyle. Here’s a simple comparison of popular dining room plants:
| plant | Light Requirements | Care Level |
|---|---|---|
| Fiddle Leaf Fig | Bright, indirect light | Moderate |
| Pothos | Low to bright light | Easy |
| Rubber Plant | Bright, indirect light | Moderate |
| Snake Plant | Low to bright light | Easy |
Incorporating a large plant or tree is not just about filling a space; it’s about creating a lively dining experience that invites conversation and connection.Embrace the beauty of nature in your dining room and watch as it transforms into a culinary haven.
Make Personalized Place Settings: Customize each guest’s place setting with unique name tags or small gifts that add a personal touch to your dining experience
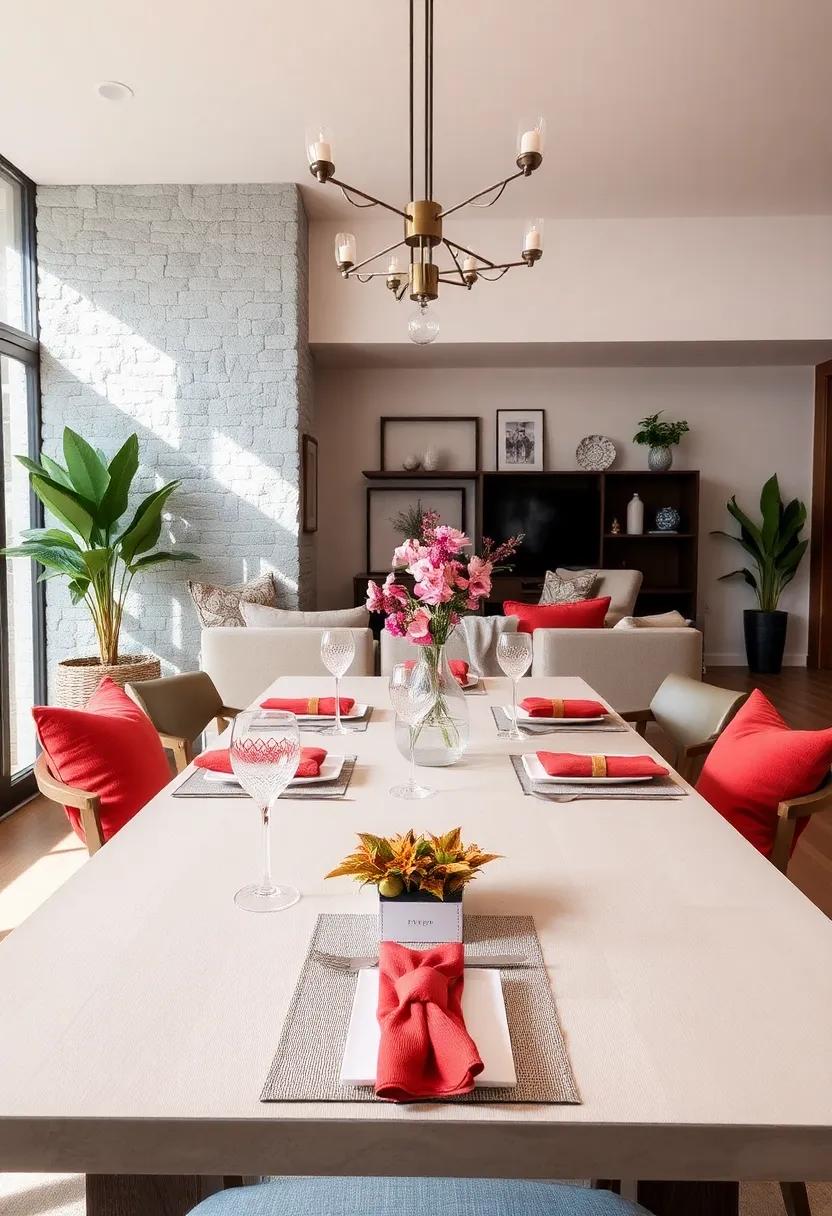
transform your dining experience by crafting personalized place settings for each guest. Start by designing unique name tags that reflect your guests’ personalities or interests. you can use materials like cardstock, twine, or even digital downloads for a modern touch. Consider the theme of your dinner—whether it’s bohemian, rustic, or elegant—and choose colors and fonts that complement it. For an added layer of customization, embellish the tags with small, hand-painted illustrations or a few words that describe what each guest brings to the table, making them feel cherished and recognized.
To enhance the personal touch even further,pair each name tag with a small gift that connects to your guests’ tastes. This could be a mini potted herb, a scented candle, or a delightful homemade treat. Present these gifts on a charming plate or a decorative fabric, adding an element of surprise to their dining experience. Here’s a quick guide to some ideal gift ideas:
| Gift Idea | Ideal Guest Type |
|---|---|
| Mini Potted Herb | Food Enthusiasts |
| scented Candle | Relaxation Seekers |
| Homemade Treats | Sweet tooth Lovers |
| Handwritten Recipe Card | Culinary Explorers |
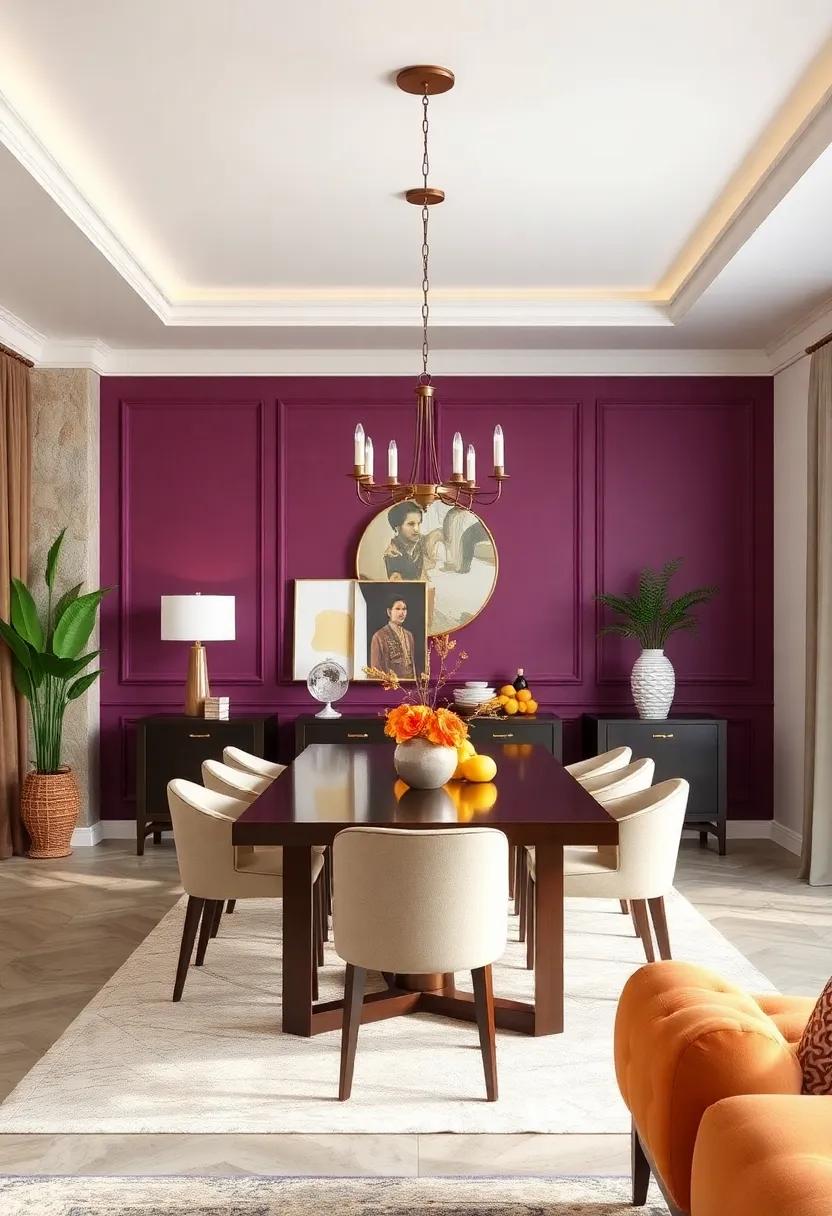
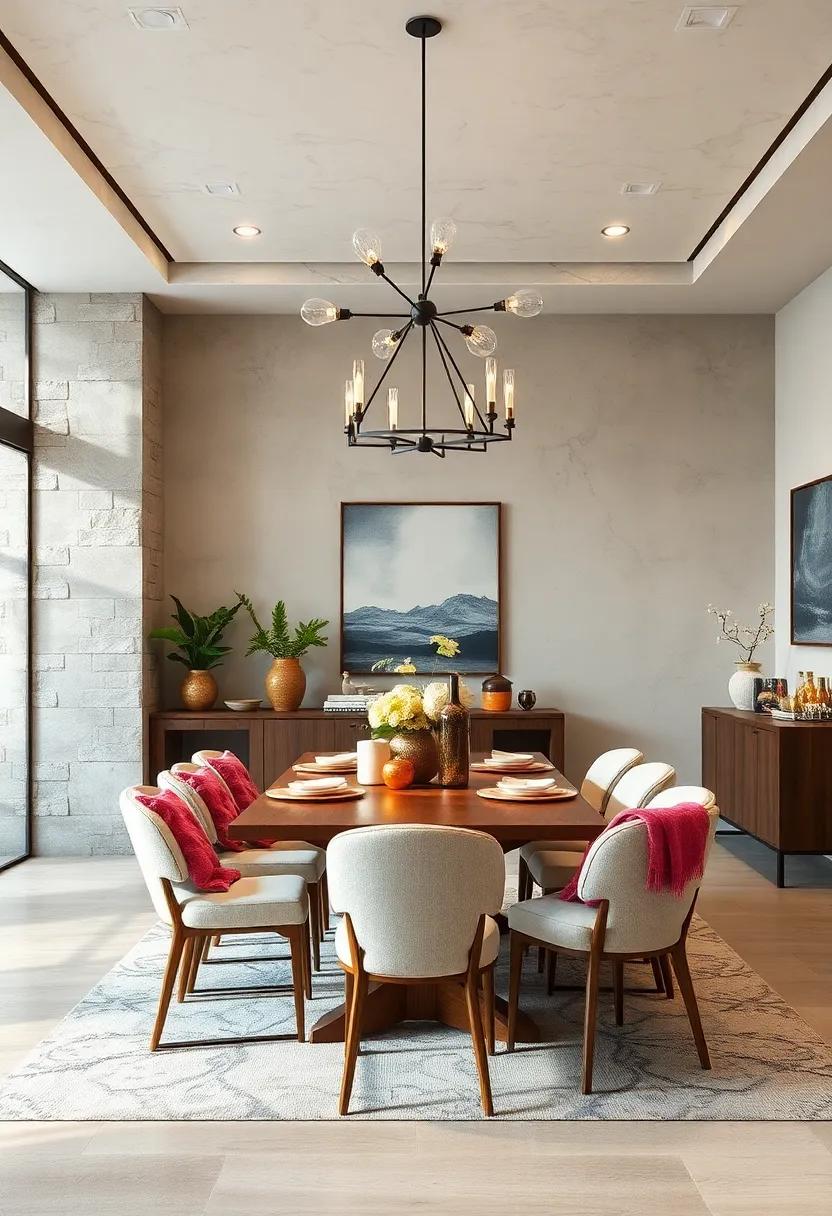
Paint an Accent Wall to Add Drama: Choose a rich color to paint one wall, creating a dramatic backdrop that enhances your dining room’s aesthetic
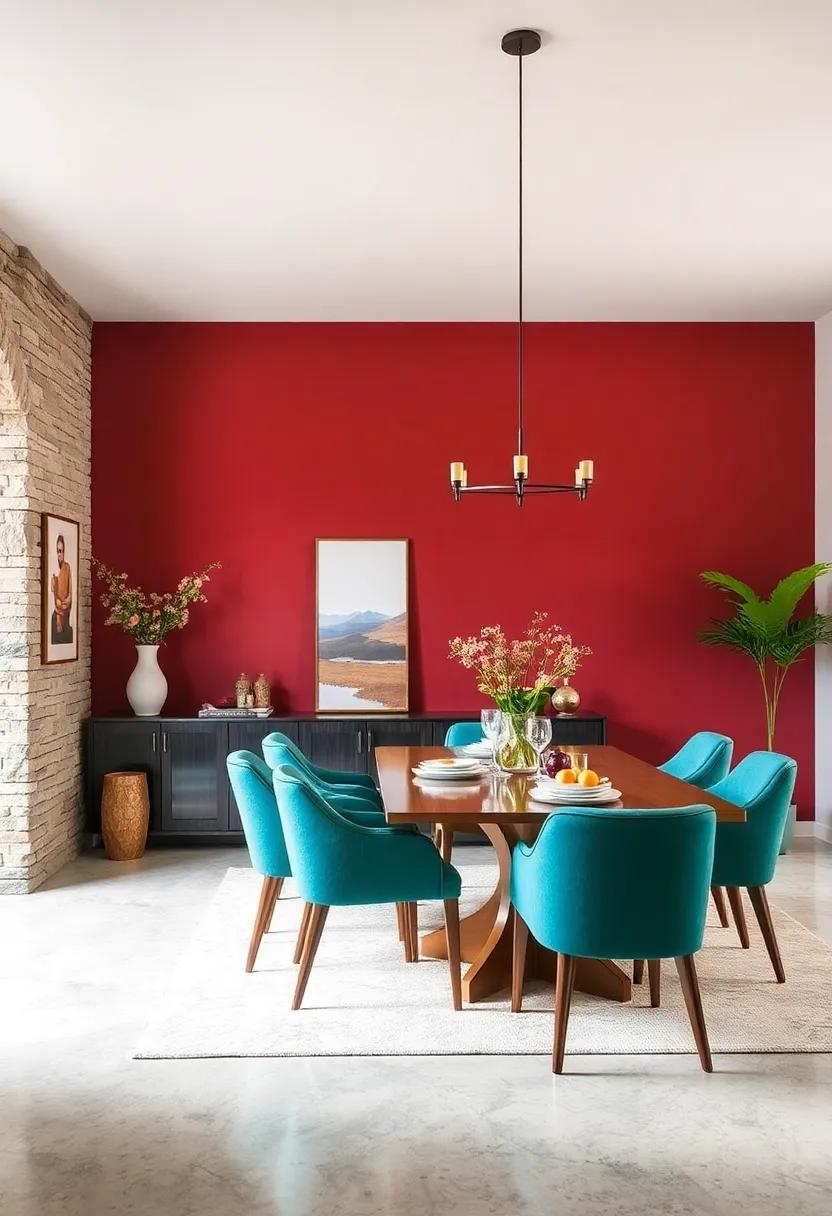
transforming your dining room can be as simple as choosing a striking hue for an accent wall. A deep navy blue or rich emerald green can create an alluring backdrop that captivates the eye and draws guests into your dining experience. This rich color palette adds depth and drama,drawing attention to decor elements such as artwork,textiles,or even a stylish serving table. Whether you opt for a glossy finish to reflect light or a matte texture for a more subdued look, the color you choose can considerably influence the mood of the room.
Here are some inspiring color options to consider for your accent wall:
- Charcoal Gray: Adds sophistication while keeping the space cozy.
- Terra Cotta: Infuses warmth and a hint of rustic charm, perfect for a Mediterranean style.
- Mustard Yellow: Brightens the room and creates a cheerful atmosphere.
- Deep Plum: Adds a touch of elegance and pairs well with metallic accents.
Once you’ve painted your accent wall, consider incorporating complementary decor to enhance the overall aesthetic:
| Element | Color Suggestions |
|---|---|
| Tableware | White or metallic |
| Cushions | Contrasting or complementary shades |
| Artwork | Bright pops of color or black and white |
Create a DIY wine Rack for Storage and Style: Build a stylish wine rack that not only stores your collection but also acts as a decorative feature in your dining area
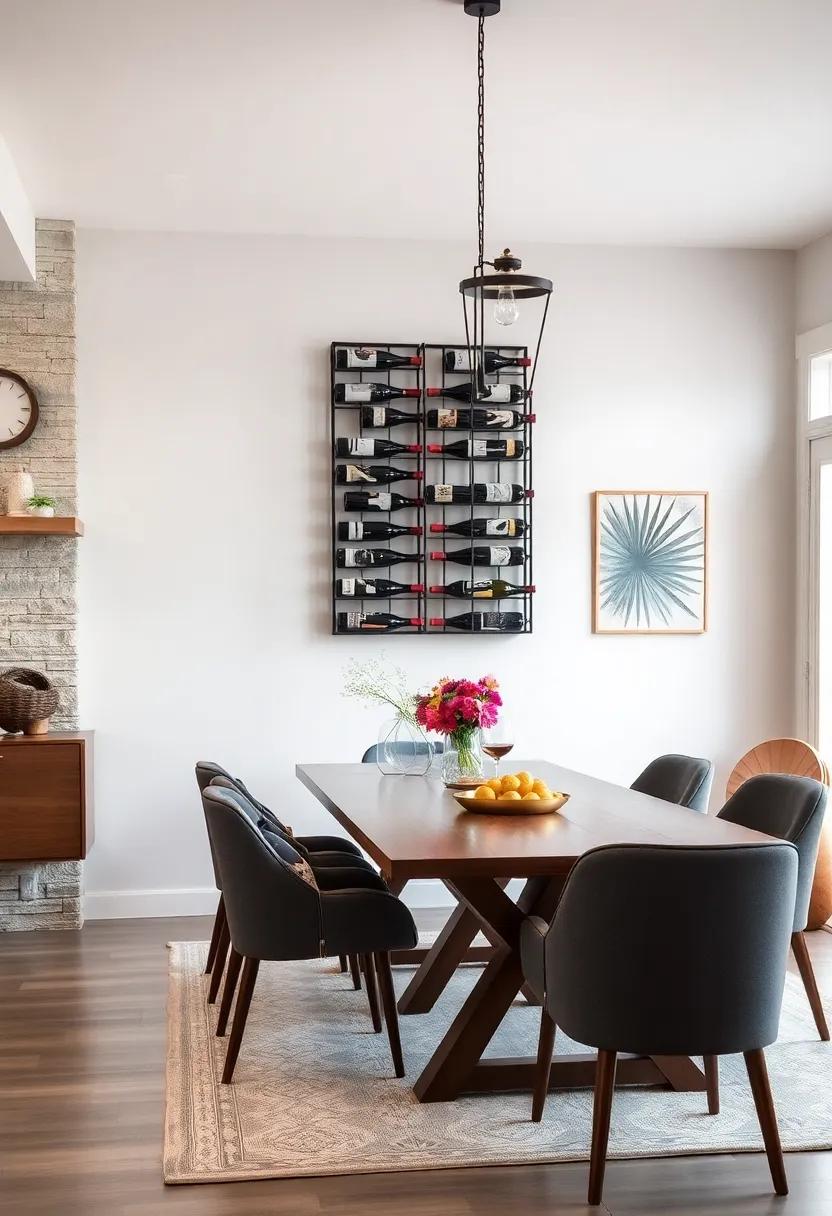
Transform your dining area with a stunning DIY wine rack that combines practicality and style. This project is not just about storing your favorite bottles; it’s also a chance to showcase your personal flair. Consider using materials like reclaimed wood for a rustic touch or sleek metal for a modern vibe. Start by measuring the space where you plan to place the rack, ensuring you have enough room for both your collection and any decorative items you’d like to display. Build a simple framework that fits your chosen aesthetic, and don’t forget to include space for glassware, making it a complete bar corner.
To elevate the design, you can incorporate unique features such as built-in LED lights to highlight your collection, or even a chalkboard section for jotting down tasting notes or your favorite pairings. A staggered shelving arrangement not only adds visual interest but also allows for both standard wine bottles and larger formats. For those seeking an even more bespoke piece, adding personal touches like engraved initials or decorative stencils can make your wine rack a focal point that sparks conversation during gatherings.
Sew Fabric Napkins for a Sophisticated Touch: Craft your own fabric napkins in various colors and patterns for an elegant, eco-friendly dining experience
Elevate your dining experience with hand-sewn fabric napkins that not only add a note of sophistication but also promote sustainability. Choose from an array of colorful fabrics and patterns to reflect your personal style. Whether you lean towards classic solid hues or vibrant prints, creating your own napkins ensures that your dinner table remains a canvas for creativity. A well-crafted napkin, stitched with care, can transform an ordinary meal into a feast for the eyes.
To get started, gather the following essentials for your seaming adventure:
- High-quality fabric (cotton, linen, or blends)
- Fabric scissors
- Sewing machine or needle and thread
- Measuring tape
- Iron for a crisp finish
As you sew, consider varying the sizes of your napkins to accommodate different dining settings, from casual brunches to elegant dinner parties. Using a combination of textures and colors can provide visual interest and enhance your table decor.Here is a quick visual reference for standard napkin sizes:
| Napkin Size | Dimensions | Best For |
|---|---|---|
| Lunch Napkin | 12″ x 12″ | Brunches, Lunch Dinners |
| Dinner Napkin | 18″ x 18″ | Formal Dinners |
| Buffet Napkin | 20″ x 20″ | Casual Gatherings |
Frame Your Favorite Recipes: Collect your favorite recipes and frame them as art pieces, merging inspiration and decoration while sparking culinary creativity
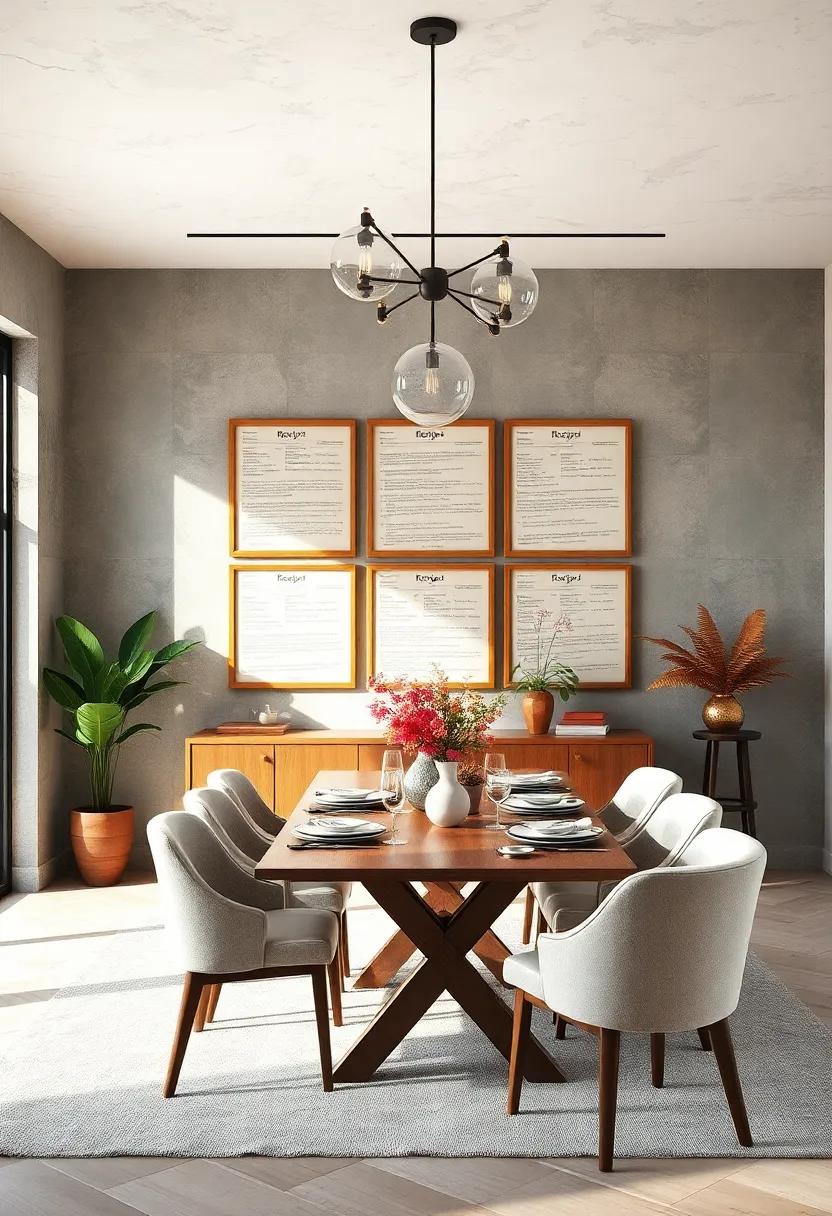
Transform your kitchen into a feast for the eyes by selecting your favorite recipes and presenting them as stunning wall art. Choose beautiful frames that complement your dining room décor, and print the recipes on high-quality paper. consider using different fonts or colors to highlight ingredients and instructions, adding personality to each piece. This unique and artistic approach not only serves as a creative display but also inspires culinary adventures, reminding you and your guests of delicious meals waiting to be prepared.
To elevate your artwork further, mix in some personal touches. Incorporate photographs of the finished dishes or even candid shots of family gatherings around the dinner table.You might also include notes about special occasions tied to each recipe, adding layers of storytelling and nostalgia. Arrange the framed pieces in a gallery style on one wall or create a whimsical cluster above your dining area. This combination of art and function will spark conversations, inspire culinary creativity, and make your dining room a true culinary haven.
Build a Farmhouse Dining Table: Follow a simple plan to create a sturdy and stylish farmhouse table that becomes the heart of your dining room
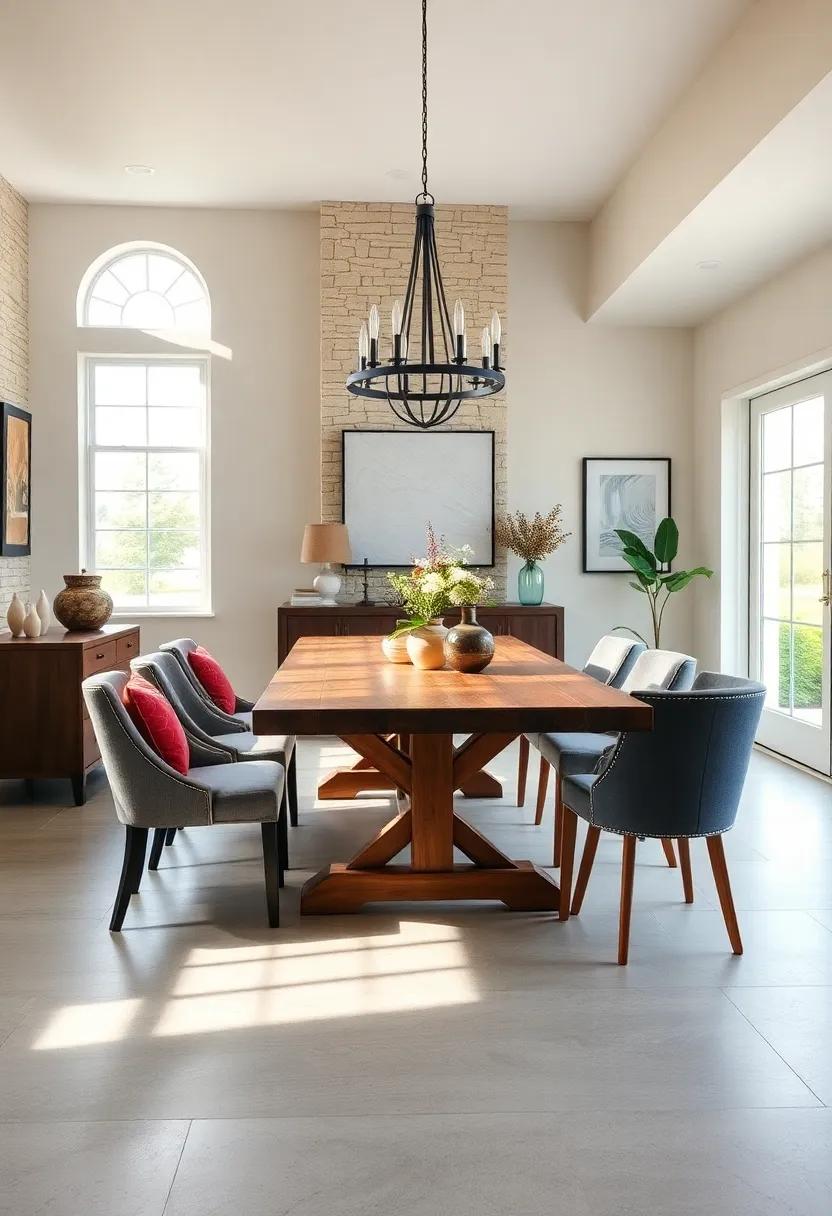
Build a Farmhouse Dining Table
Creating a farmhouse dining table is not only a rewarding project but a chance to craft a centerpiece for your home. Start with quality materials like solid wood, which lends both durability and character. The basic structure involves the following steps:
- Select Your Wood: Choose between pine for a budget-friendly option or oak for a more upscale finish.
- Design the Table: Decide the dimensions based on your dining room space; a standard table is about 72 inches long.
- Build the Frame: Construct a sturdy frame using 2x4s as support beams, ensuring a solid foundation.
- Attach the Legs: Opt for a farmhouse-style leg, which can be made using 4x4s for that traditional look.
- Stain and Seal: Choose a stain that matches your existing decor then seal it for protection.
once your table is built, consider enhancing it with some rustic charm through additional details. Adding a simple table runner or a set of vintage-inspired placemats can elevate your dining experience. To enhance the visual appeal, think about incorporating a matching set of chairs or using an array of mismatched ones for a more eclectic feel. Here’s a quick table outlining charming farmhouse decor elements to complement your new masterpiece:
| Element | Description |
|---|---|
| Centerpiece | A rustic vase filled with wildflowers or seasonal décor. |
| Lighting | Farmhouse pendant lights or a wrought-iron chandelier. |
| Wall Art | Framed botanicals or vintage farmhouse signs for character. |
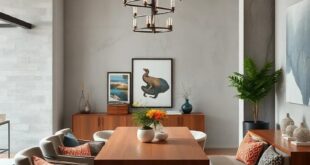
Use Mirrors to Create Illusions of Space: Hang mirrors strategically to make your dining area feel larger and reflect light, enhancing the overall ambiance
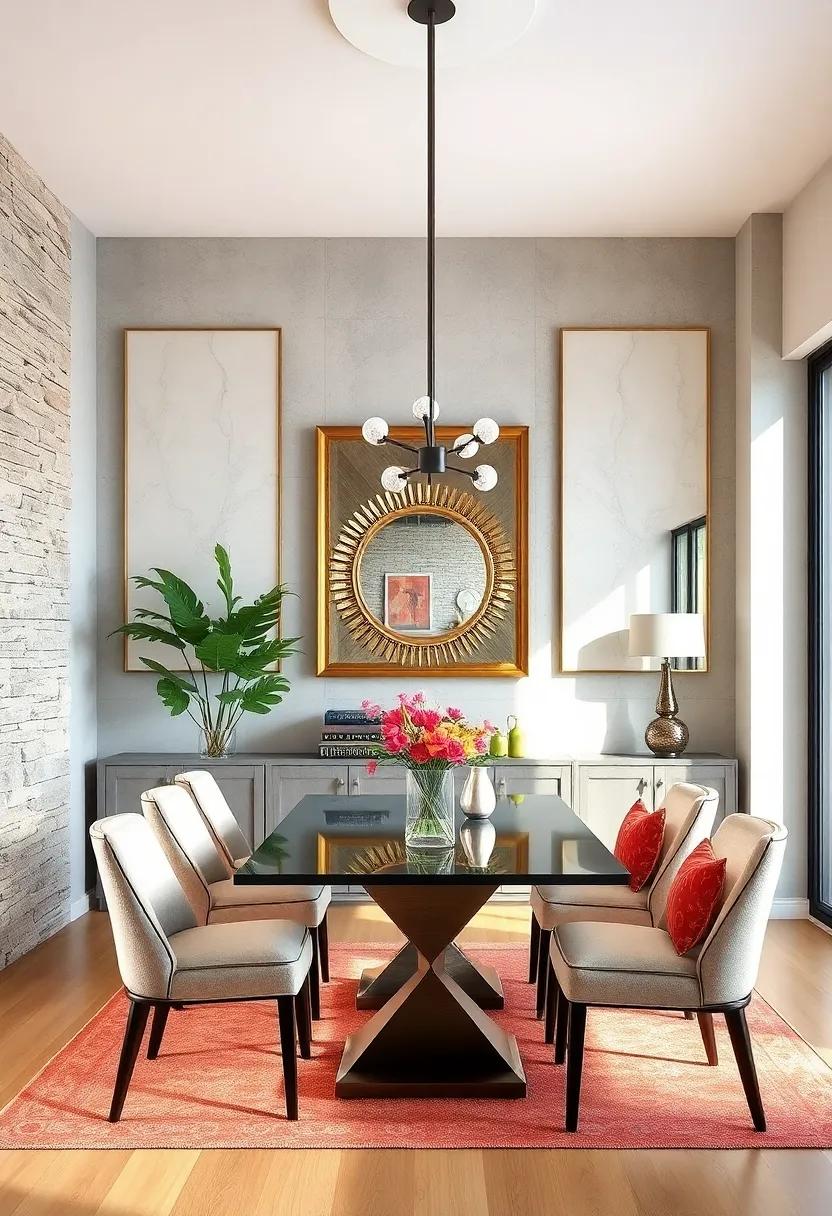
Transforming your dining area into a spacious culinary haven can be achieved with the clever use of mirrors. By hanging mirrors on walls strategically, you can create an illusion of depth that makes the room feel larger than it is indeed.Positioning large wall mirrors directly across from windows will help to reflect natural light, effectively brightening the space and infusing it with a warm, welcoming ambiance.
Consider these tips for maximizing the impact of mirrors in your dining area:
- Layered Reflections: Use a combination of mirrors in varying sizes for an eclectic yet cohesive look.
- Frame Style: Select mirrors with elegant frames that complement your existing decor.
- Angle Matters: Hang mirrors at an angle to catch and reflect light from different sources.
| Mirror Type | Ideal Placement | Effect |
|---|---|---|
| Full-Length Mirror | Corner of the Room | Creates a sense of openness |
| Decorative Wall Mirror | Above Sideboard | Adds elegance and visual interest |
| Cluster of small Mirrors | Gallery Wall | Enhances texture and dimension |
Fashion a DIY Table Centerpiece from Natural Items: Collect stones, driftwood, or flowers from nature to design a rustic centerpiece that brings the outdoors in
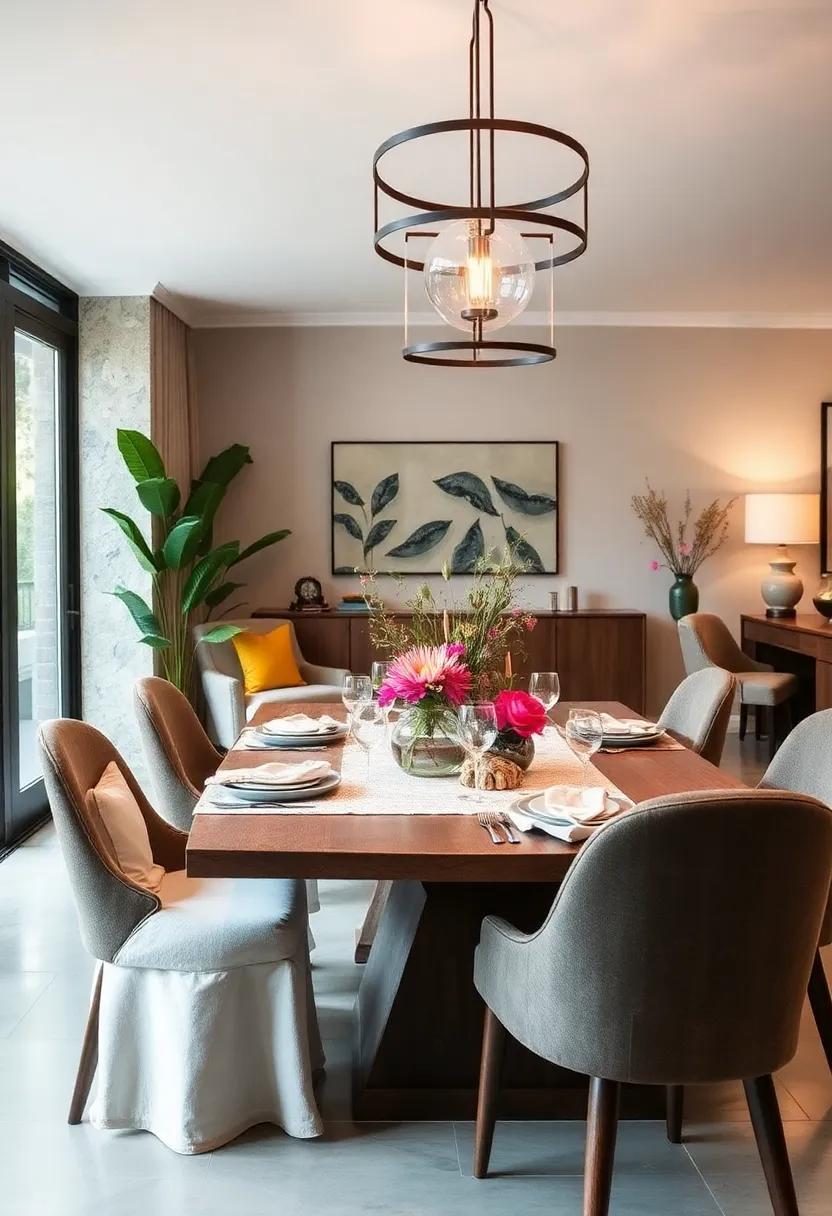
Transforming your dining table into a stunning centerpiece using natural elements is both eco-friendly and aesthetically pleasing.Start your project by venturing into a local park or beach to gather stones, driftwood, and wildflowers. These items encapsulate the essence of the outdoors and can be arranged in countless creative ways. For a more organized look, consider using a shallow wooden tray. arrange your collected treasures, layering the stones and driftwood, and adding pops of color with fresh wildflowers. Incorporate candles for an enchanting evening ambiance,ensuring to place them safely amongst the natural decor.
To maintain the rustic charm, opt for a color palette that reflects the hues of nature. Here are some ideas for key components to include in your centerpiece:
| Natural Items | Suggested Uses |
|---|---|
| Stones | Create a textured base or fill the gaps between larger items. |
| Driftwood | use as a striking focal point or as a base for candle placement. |
| Wildflowers | Add vibrant color and a natural fragrance to enhance the setup. |
| Moss | Soften the overall appearance by placing it around stones and wood. |
Whether you choose to go minimalistic or elaborate, the key is to let each item shine while highlighting the beauty of nature. Mixing various textures and forms will create visual interest and spark conversation around your dining space.
Customize dinnerware with your Personal Touch: Use ceramic paint or decals to personalize plain dishware, adding uniqueness to your dining experience
Transforming plain dishware into personal masterpieces is an engaging way to elevate your dining experience. With a few supplies like ceramic paint or intricate decals, you can craft pieces that reflect your personality and style. Imagine the delight of serving dinner on plates that boldly display your favorite quotes, designs, or even hand-painted illustrations. The process is not only creative but allows your dining table to share a story—your story.
When customizing dinnerware, consider these fun ideas:
- Theme Nights: Create a set of dishes that represent different cuisines or cultures for themed dinners.
- Seasonal Decor: Change the decor on your plates based on the season—think autumn leaves for fall or snowflakes for winter dinners.
- Family Crests: Design dinnerware featuring your family name or emblem, perfect for gatherings and festive occasions.
- Kids’ Art: Encourage your children to paint their favorite designs, making mealtime a colorful adventure.
To get started, gather materials such as ceramic markers, paint, and a sealant. You can also use templates for precision when applying decals or stencils. Here’s a quick comparison to help you decide:
| option | Difficulty | Durability | Time |
|---|---|---|---|
| ceramic Paint | Moderate | High (after baking) | 1-2 hours |
| Decals | Easy | Medium | 30 mins |
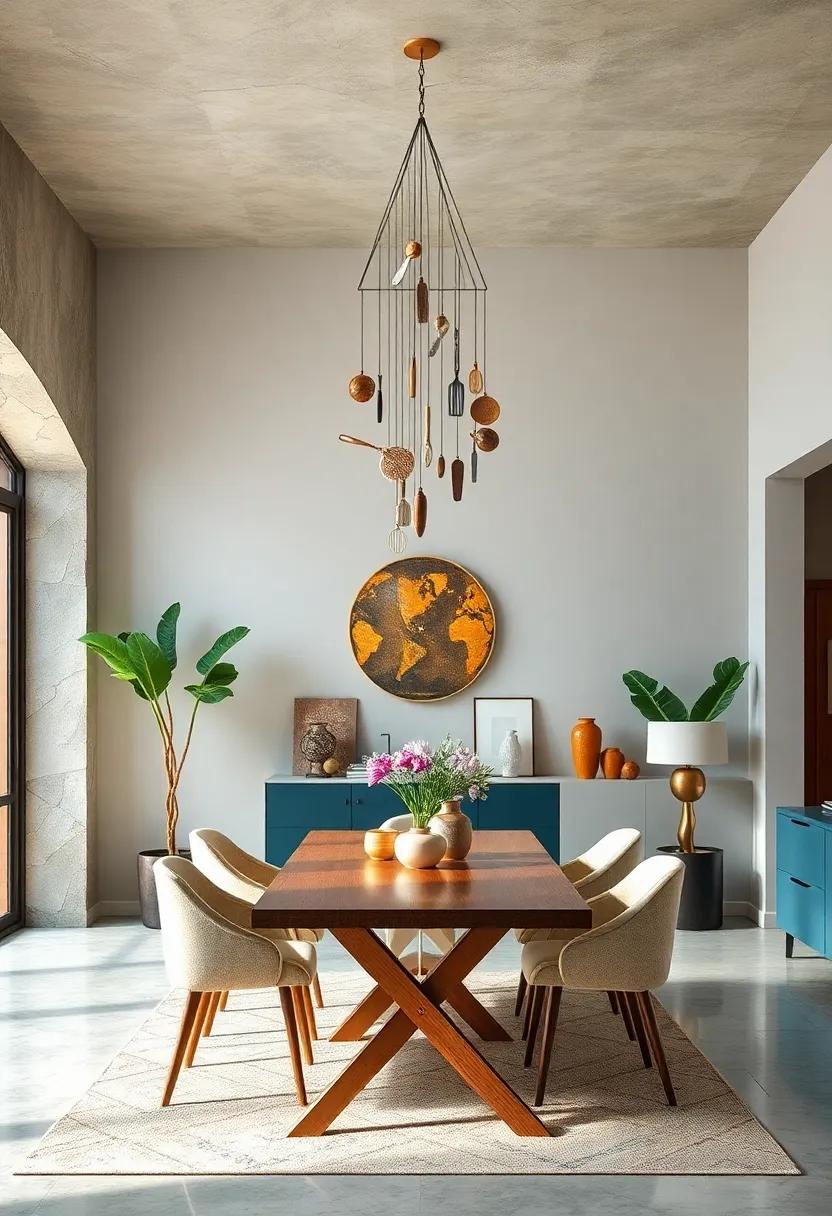
Create a Whimsical Ceiling Mobile: Hang a mobile made from kitchen tools or decorative items above your dining table, adding a playful element to your design
Transform your dining area into a whimsical wonderland by crafting a delightful ceiling mobile that showcases an array of kitchen tools and decorative items. This playful installation can ignite your imagination and elevate your culinary experiences. Here’s how to gather your materials and bring your vision to life:
- Whiskers of Grace: Utilize old whisks as charming hooks for hanging decorative elements.
- Sassy Spoons: Incorporate colorful wooden or metal spoons to add visual interest.
- Funky Forks: Use a selection of forks to create thrilling shapes as part of the mobile.
- Pots of Delight: Hang small, lightweight pans that jingle slightly when stirred by air movement.
- Fabric Flourishes: Attach vibrant fabric scraps or ribbons for an added burst of color.
| item | Purpose |
|---|---|
| Whisks | Hanging base structure |
| Spoons | Adds visual flair |
| Fabric Scraps | Colorful additions |
| Pans | Movement and sound |
To assemble your mobile, start by securing your whisks in a circle or an interesting shape using sturdy string or fishing line.Next, carefully attach your chosen kitchen utensils and decorative items at varying lengths to create depth and dynamism. As you hang your creation above the dining table, be sure it’s at a height that allows for unobstructed views while enjoying a meal. This charming ornamental piece,brimming with personality,will not only serve as a focal point but also inspire delightful conversations as guests gather around the table.
Use Colorful Storage Baskets for Organization: Incorporate decorative baskets for storing table linens and utensils, keeping your dining area organized and chic
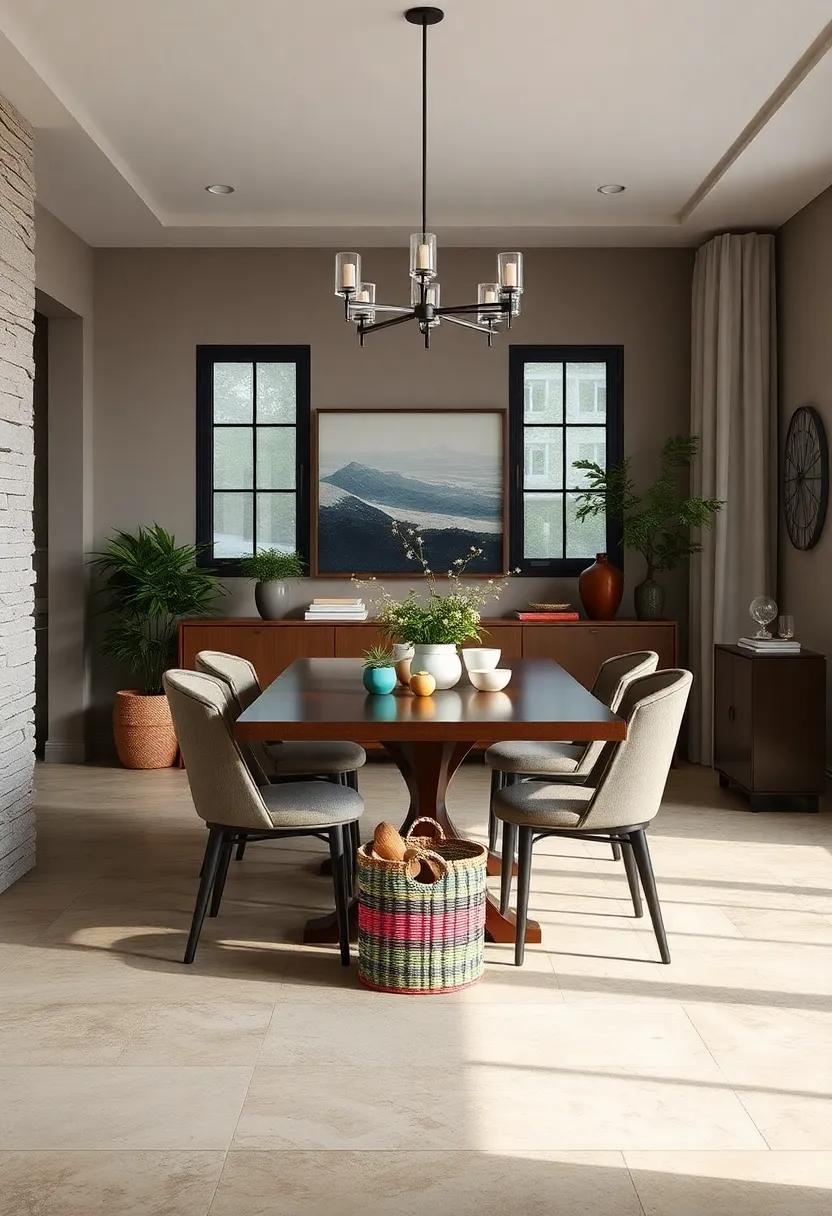
One of the simplest yet most effective ways to add organization and style to your dining area is through the use of colorful storage baskets. These versatile containers can serve multiple purposes, from holding table linens to neatly arranging utensils. The vibrant hues and patterns of the baskets not only enhance the overall aesthetic of your space but also provide a practical solution to clutter. by strategically placing them on shelves,countertops,or even under benches,you can create a visually appealing display while keeping everyday dining essentials within reach.
Consider selecting baskets in various sizes and textures to add depth to your decor. As an example,you can use large woven baskets for storing tablecloths and napkins,while smaller fabric bins can hold utensils and place settings. To take it a step further, try color-coordinating your baskets with your dining room’s theme or even the seasons, mixing & matching patterns to create a unique design statement. Here are a few ideas for maximizing both style and function:
- natural Fiber Baskets: Perfect for a rustic touch.
- Bold Colored baskets: Add a pop of vibrancy to neutral spaces.
- Patterned baskets: Infuse personality and fun into your dining area.
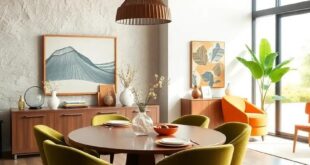
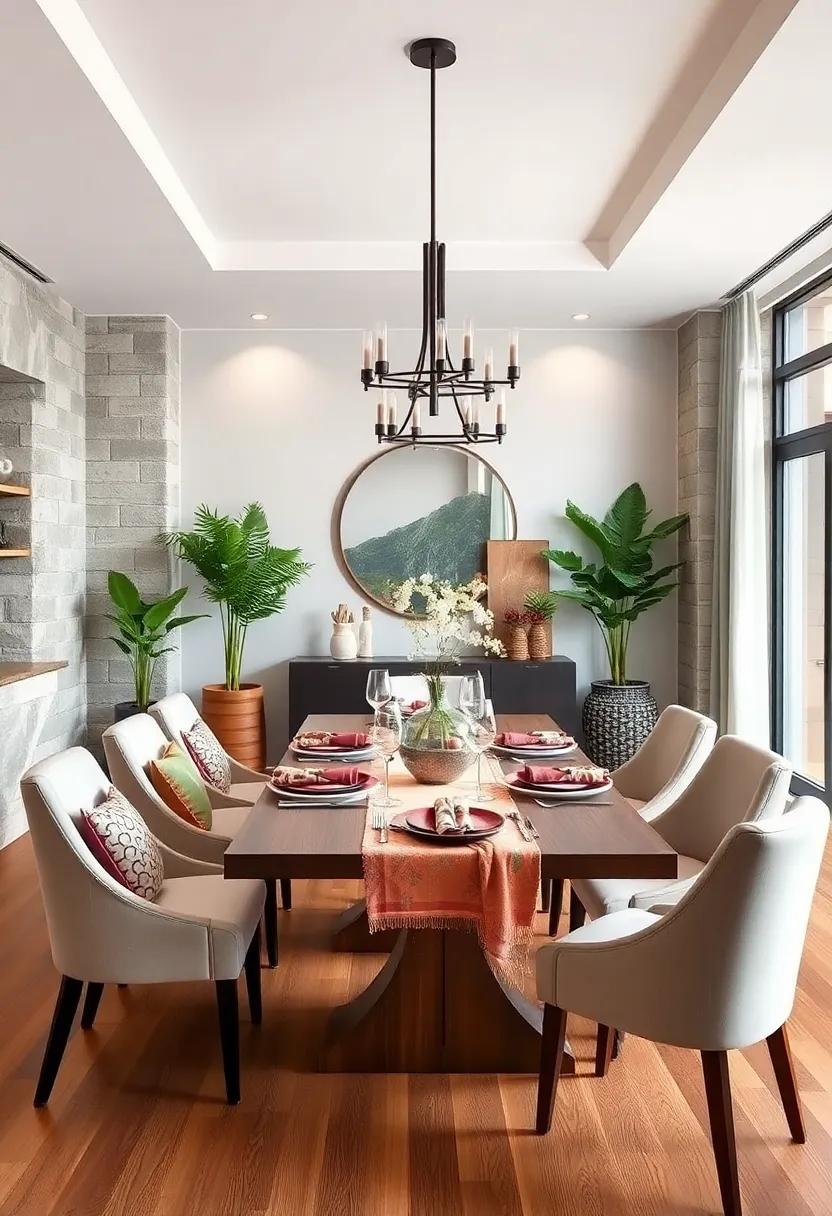
Design a themed Dining Experience: Choose a specific theme, such as a country or coastal vibe, and decorate accordingly to create a fun and immersive dining environment
Crafting a themed dining experience is an excellent way to transport your guests and elevate the ambiance of your space. choose a specific theme, such as Italian countryside or a coastal beach getaway, and let it inspire your decor.For an italian theme, consider rustic wooden tables, checkered tablecloths, and terracotta pottery. Accent the space with fresh herbs like basil and rosemary in small pots, and hang up vintage Italian pasta posters for that authentic touch.Alternatively, for a coastal vibe, use a palette of blues and whites, with driftwood accents and seashell table settings. Don’t forget to play with lighting; soft fairy lights strung overhead can mimic the feel of a starlit evening by the sea.
To make the dining experience even more immersive, engage all senses with carefully selected tableware and decor items. Here’s a quick guide to essential elements for each theme:
| Theme | Decor Elements | Table Settings |
|---|---|---|
| Italian Countryside | Rustic wooden accents, wine bottles, terracotta pots | Checked tablecloth, terracotta dishes, wine glasses |
| Coastal Beach Getaway | Driftwood centerpieces, seashells, sand | Blue dishes, starfish napkin rings, coral decorations |
Combining these elements will not only beautify your dining area but also set the mood for each meal, making every bite a memorable experience. Don’t forget to curate a playlist that complements your chosen theme; the right music can truly elevate the setting.Transform your dining room into a vibrant culinary haven that invites conversation and enjoyment with every gathering.
In Summary
As we wrap up our journey through these 29 inspiring DIY dining room projects, it’s time to reflect on the potential that lies within your space. each idea presents not just a creative outlet, but an prospect to transform the heart of your home into a culinary haven where laughter, shared meals, and unforgettable memories can flourish. Whether you opt for a bold color palette, unique decor pieces, or personalized accents, every project is a stepping stone toward customization and comfort.
Remember, the beauty of DIY is in its flexibility—adapt these ideas to suit your style and needs. Let your dining room reflect your vision, welcoming friends and family to gather around the table time and time again. So roll up your sleeves, unleash your creativity, and enjoy the process as you craft a space that truly feels like home. Happy DIY-ing!